

A rush order lands on your desk: thirty small cooling holes in Inconel turbine blades, each one demanding repeatable location and depth. The team can run the work on a manual EDM hole popper, build a semi-automated cell, or justify a fully robotic system. The machine choice matters, but so do electrode wear, fixturing consistency, dielectric control, operator involvement, and the quality records your process requires.
EDM hole poppers, also called small-hole EDM or fast-hole EDM, are often the practical middle ground for recurring small-hole work. Commercial systems commonly cover holes from about 0.012 inch, or 0.3 mm, to roughly 0.25 inch, or 6 mm, while specialized machines reach minimum diameters near 0.1 mm according to industry guidance on precision small-hole EDM. The right decision isn't manual versus automated. It starts with the hole range, material, depth, throughput, and process discipline your shop can support.
Table of Contents
- Why EDM Hole Poppers Deserve a Second Look in Your Shop
- How EDM Hole Poppers Work
- Hole Poppers vs Wire EDM Starter Holes vs Precision EDM Drills
- Choosing the Right EDM Hole Popper for Your Application
- Integrating EDM Hole Poppers Into Semi-Automated Production
- Maintenance, Calibration, and GMP Discipline for EDM Hole Poppers
- A Practical Example of an EDM Hole Popper Cell in Action
- Making the Right Call for Your Production
Why EDM Hole Poppers Deserve a Second Look in Your Shop
A plant manager handling recurring turbine-blade holes must choose an automation level that matches the work. A manual machine may demand close operator attention and repeated positioning. A semi-automated cell can standardize loading, electrode changes, and program selection. A fully robotic system suits stable, repetitive production, but it can add cost and integration effort when the shop runs mixed part families.
Start with the work, not the catalog. Record hole diameters, depths, material families, positional requirements, holes per part, and weekly demand. For many mid-volume operations, the practical opportunity sits between prototype work and high-volume transfer production. Hole poppers can outperform conventional drilling when hardness, depth, or tool fragility makes mechanical cutting unreliable. They can also provide a more direct route than producing starter holes with wire EDM.
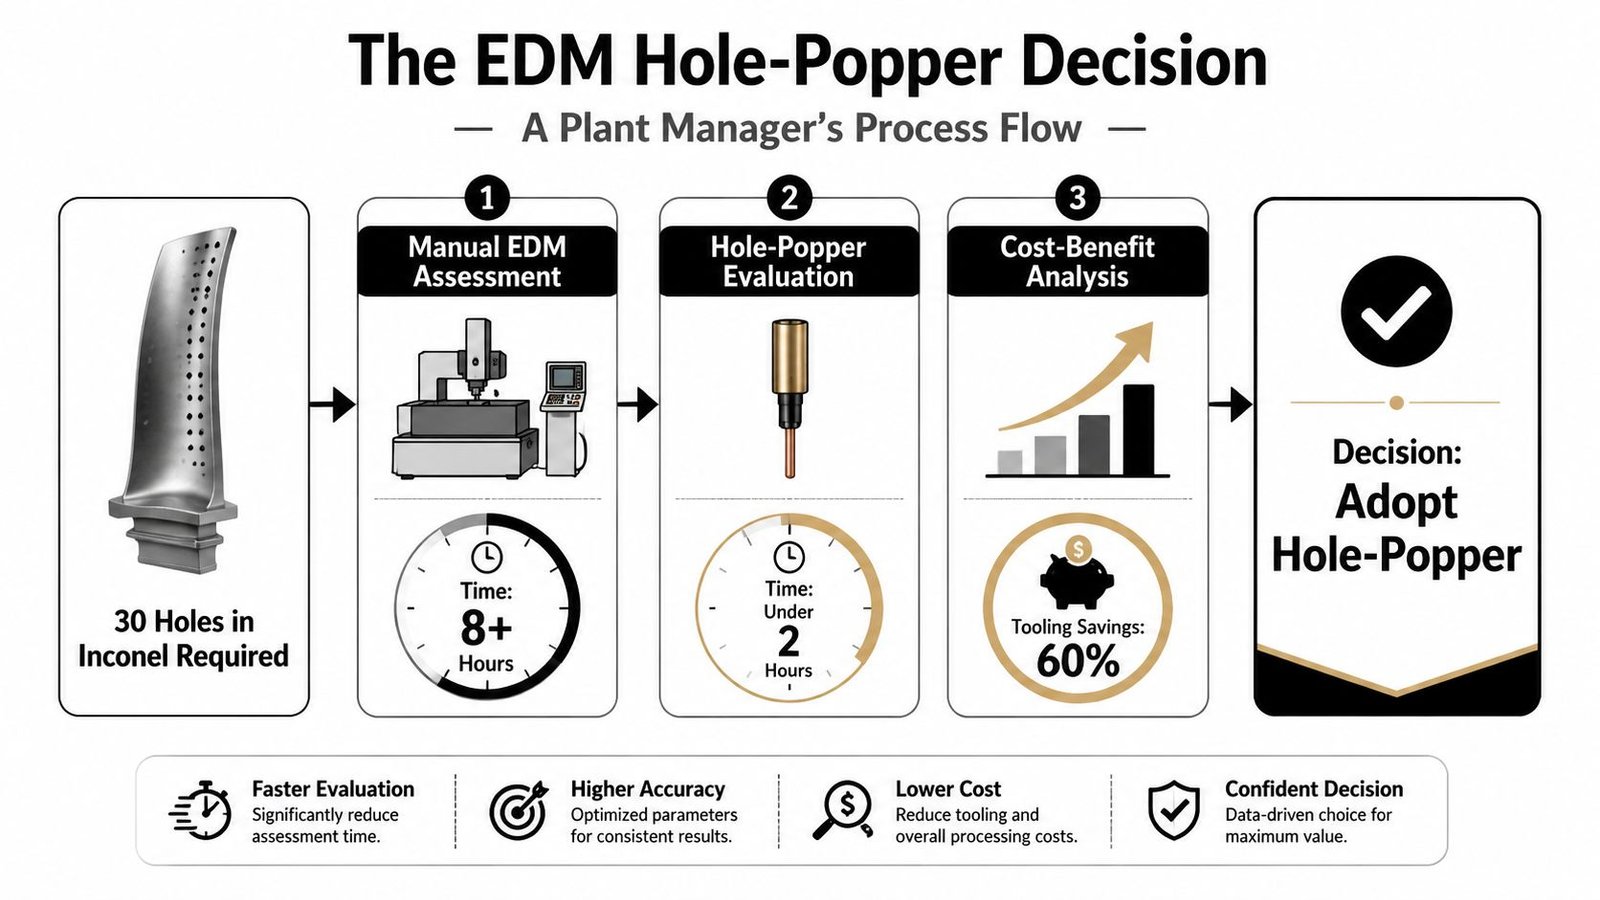
Practical rule: Choose the simplest automation level that keeps the process stable across the part mix. More robotics will not correct poor fixturing, uncontrolled electrode wear, or inconsistent dielectric flow.
Evaluate the production constraint first
Use a short review before requesting quotations:
- Hole geometry: Separate standard small holes from micro-holes, blind holes, and unusually deep features.
- Material: Confirm that every target material is electrically conductive. EDM requires a suitable conductive workpiece and setup.
- Repeatability: Determine whether one fixture and program will run repeatedly or operators will change parts frequently.
- Quality system: Medical work requires traceable calibration, maintenance, training, and process records, not only a capable machine.
- Throughput: Compare complete cycle time, including loading, probing, electrode changes, flushing, inspection, and alarm recovery.
The process has progressed from early electrical-discharge erosion to machines capable of much higher spark frequency, supporting modern blind-hole and turbine cooling-hole work. The history of EDM development provides that technical context. For production planning, the implication is straightforward: a hole popper should be evaluated as a controlled process, with electrode wear, flushing, fixturing, records, and operator involvement included in the decision. That framework exposes whether manual, semi-automated, or robotic operation fits the actual part mix.
How EDM Hole Poppers Work
A hole popper removes metal without forcing a cutting tool into the workpiece. A hollow copper or brass tube electrode approaches a conductive part while a controlled electrical gap separates the two. Each discharge produces a small, localized erosion event. Thousands of timed sparks remove microscopic volumes instead of a rotating tool producing a continuous chip.
Four actions run together:
- The power supply pulses energy across the gap.
- The electrode advances and often rotates as the hole develops.
- Dielectric fluid flushes the machining zone, carrying eroded particles away and controlling heat.
- The servo maintains the gap, retracting or advancing as conditions change.
The tubular electrode provides an internal passage for dielectric delivery near the discharge zone. Rotation spreads wear around the electrode and supports a more consistent erosion pattern. In deeper or more demanding holes, controlled reciprocation helps clear debris and lowers the risk of electrode damage. Blind holes need closer attention because debris has fewer escape paths. Poor flushing can slow the cycle, destabilize sparking, and affect hole quality.
The process has roots in Joseph Priestley's 1770 discovery of erosion by electrical discharge. Harold Stark, Victor Harding, and Jack Beaver later refined EDM for removing broken drills and taps. The method became practical after water was introduced as a coolant. Later vacuum-tube EDM development increased spark frequency from 60 times per second to well over 1,000, supporting the operating principles used in modern hole-popper equipment, as described in this account of EDM's development.
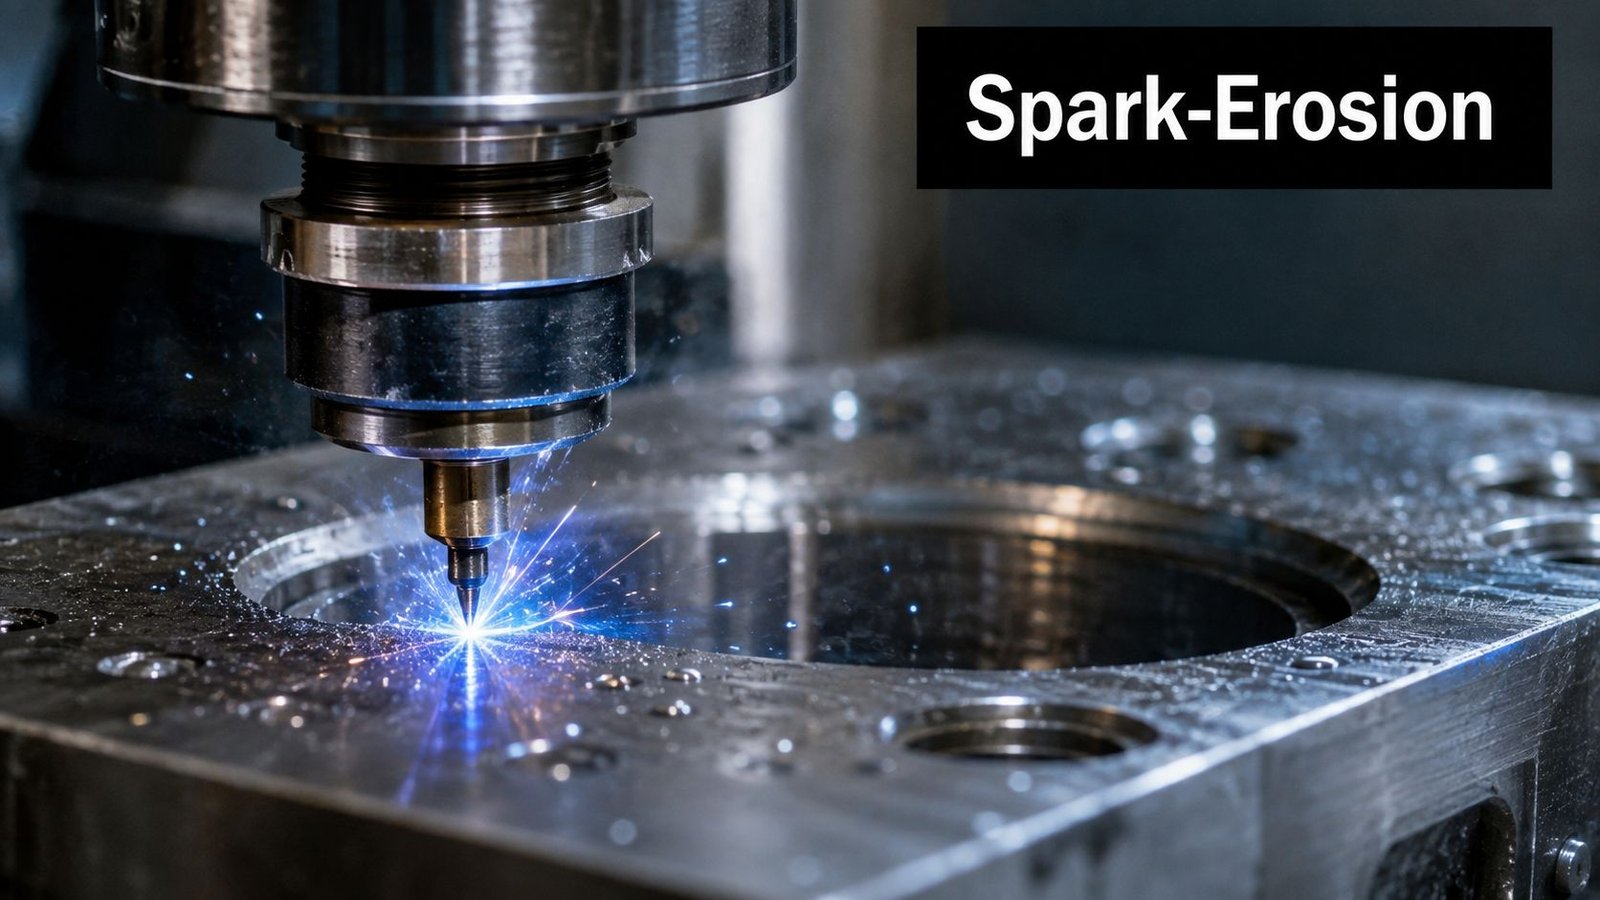
What the physics means on the floor
Because the electrode applies little normal cutting force, the process can machine hardened steel, titanium, carbide, and other difficult conductive materials where mechanical drilling may drift, break, or create unacceptable stress. The trade-off is thermal. Recast material and a heat-affected region can remain on the hole wall, so sealing surfaces, fatigue-critical features, and tightly controlled flow passages may require inspection or secondary finishing.
Hole size and throughput are tied to the process settings. Higher spark energy can remove material faster, but it can also increase electrode wear and alter the finished geometry. Electrode material, dielectric condition, flushing, and servo control therefore belong in the production plan, not only in the machine quotation.
A study of dielectric and electrode combinations reported nearly 50% lower wear than brass with deionized water under its tested conditions, as documented in the EDM dielectric and wear study. In a mixed part family, that trade-off affects consumable cost, electrode-change frequency, hole consistency, and the level of automation the cell can support.
Hole Poppers vs Wire EDM Starter Holes vs Precision EDM Drills
The three technologies overlap, but they solve different production problems. A wire EDM starter hole is usually an access feature that lets the wire enter a closed profile. A precision EDM micro-drill is selected when the diameter and tolerance move below the comfortable range of a conventional hole popper. The hole popper occupies the broad workhorse territory between those extremes.
Industry coverage commonly places hole-popper work around 0.006 to 0.200 inch, while precision EDM drilling can reach approximately 0.003 inch or below, as explained in this comparison of EDM drilling options. Commercial small-hole systems may use electrode diameters from approximately 0.08 to 0.25 mm, and published Sodick data show a 20 µm tungsten electrode producing a hole around 37 to 40 µm in 0.3 mm-thick material, demonstrating how controlled spark erosion creates overcut beyond the electrode size in the K1BL machine data.
| Attribute | EDM Hole Popper | Wire EDM Starter Hole | Precision EDM Micro-Drill |
|---|---|---|---|
| Primary purpose | Produce recurring small holes in conductive materials | Create access for wire threading into a closed profile | Produce extremely small or tightly controlled micro-holes |
| Typical selection logic | Use when hole diameter, depth, and throughput sit in the general small-hole range | Use when only an entry point is needed for a later wire-cut operation | Use when the hole is below the practical range of standard hole-popper tooling |
| Material fit | Hardened steels, aerospace alloys, and other conductive difficult-to-cut materials | Conductive workpieces that will receive wire EDM | Conductive materials requiring fine-scale drilling |
| Production trade-off | Balances capability, speed, and electrode consumption | Adds a separate setup and does not replace the drilling operation | Offers finer capability but usually demands slower, more controlled processing |
| Best management question | Can one cell repeat the hole pattern across the part mix? | Is wire EDM the real downstream operation? | Is the required diameter small enough to justify specialized tooling? |
A wire machine remains the right answer when the part already requires internal profile cutting and the starter-hole demand is limited. It isn't a substitute for a production drilling cell. For a broader CNC and EDM equipment review, see CNC and EDM machine options.
Choosing the Right EDM Hole Popper for Your Application
A part family may contain short through-holes, deep blind holes, and tight straightness requirements. Choosing one machine from the brochure can leave the cell fast on easy parts and unreliable on the difficult ones. Start with the drawing and the production mix, then match the machine to the worst hole it must repeat.
Six inputs narrow the field
Minimum diameter sets the lower boundary for the electrode, guide, flushing path, and power-control resolution. Standard small-hole systems may cover approximately 0.012 inch, or 0.3 mm, through 0.25 inch, or 6 mm, while specialized machines reach near 0.1 mm, according to precision small-hole EDM capability data. Confirm the machine's practical range with your electrode supplier and trial parts, not only its catalog specification.
Depth-to-diameter ratio determines how strongly flushing, electrode stability, and servo response affect the process. A deep blind hole requires a different validation plan from a short through-hole, even when both share the same diameter. Cycle consistency usually becomes harder before the nominal size becomes the obvious problem.
Straightness tolerance deserves separate attention from diameter tolerance. A hole can finish at the correct size and still fail because it wanders through the workpiece. Ask how the machine verifies alignment, compensates for electrode wear, and maintains the reference axis across the part family.
Material family affects removal behavior and consumable selection. Hardened steels, carbide, titanium, nickel alloys, and other conductive materials may all be suitable, but they will not produce identical wear patterns or cycle behavior. Run representative material, thickness, and geometry combinations before fixing production parameters.
Electrode wear rate must be measured during that trial. Brass is often economical for general work. Copper offers different wear and conductivity behavior. Tungsten becomes relevant for very small electrodes, where dimensional stability can justify its higher consumable burden.
Cycle time per hole includes approach, spark time, retract, flushing pauses, inspection, and electrode replacement. A high discharge rate provides little value if poor fixturing causes rework or damaged electrodes consume the shift.
| Selection Input | Standard Popper | High-Speed Popper | Micro-Hole EDM |
|---|---|---|---|
| Diameter priority | General small-hole production | Larger or less delicate holes where removal rate leads | Very small holes and fine process control |
| Depth priority | Moderate depth with stable flushing | Thick workpieces and productivity-focused jobs | Narrow, sensitive holes requiring controlled erosion |
| Wear approach | Balance electrode cost and output | Accept higher wear for faster removal | Prioritize electrode stability and dimensional control |
| Automation fit | Manual or semi-automated mixed work | Automated production with repeatable loading | Controlled cell with strong monitoring and inspection |
| Main risk | Underestimating variation between part families | Paying for speed that the fixture or quality plan cannot use | High consumable and validation burden |
Through-spindle flushing generally deserves preference when debris must travel directly from the electrode through a deep hole. Side flushing can handle accessible geometry and simpler work, but it becomes less forgiving as depth increases or the hole turns blind. Score each candidate against the most demanding hole, then validate the choice with sample parts and the actual electrode, fixture, and inspection method planned for production.
Integrating EDM Hole Poppers Into Semi-Automated Production
A practical semi-automated cell doesn't begin with a robot. It begins with a repeatable part reference. If the operator loads each component against a different surface or clamps thin material inconsistently, automation will only reproduce the variation more efficiently.
Build the cell around repeatability
Use a palletized fixture or a dedicated nest with a defined zero reference. Confirm that the electrode guide can approach every hole without collision and that the dielectric return path remains clear. For mixed part families, maintain a controlled library containing the part program, fixture ID, electrode type, electrode length range, flushing setup, and inspection requirements.
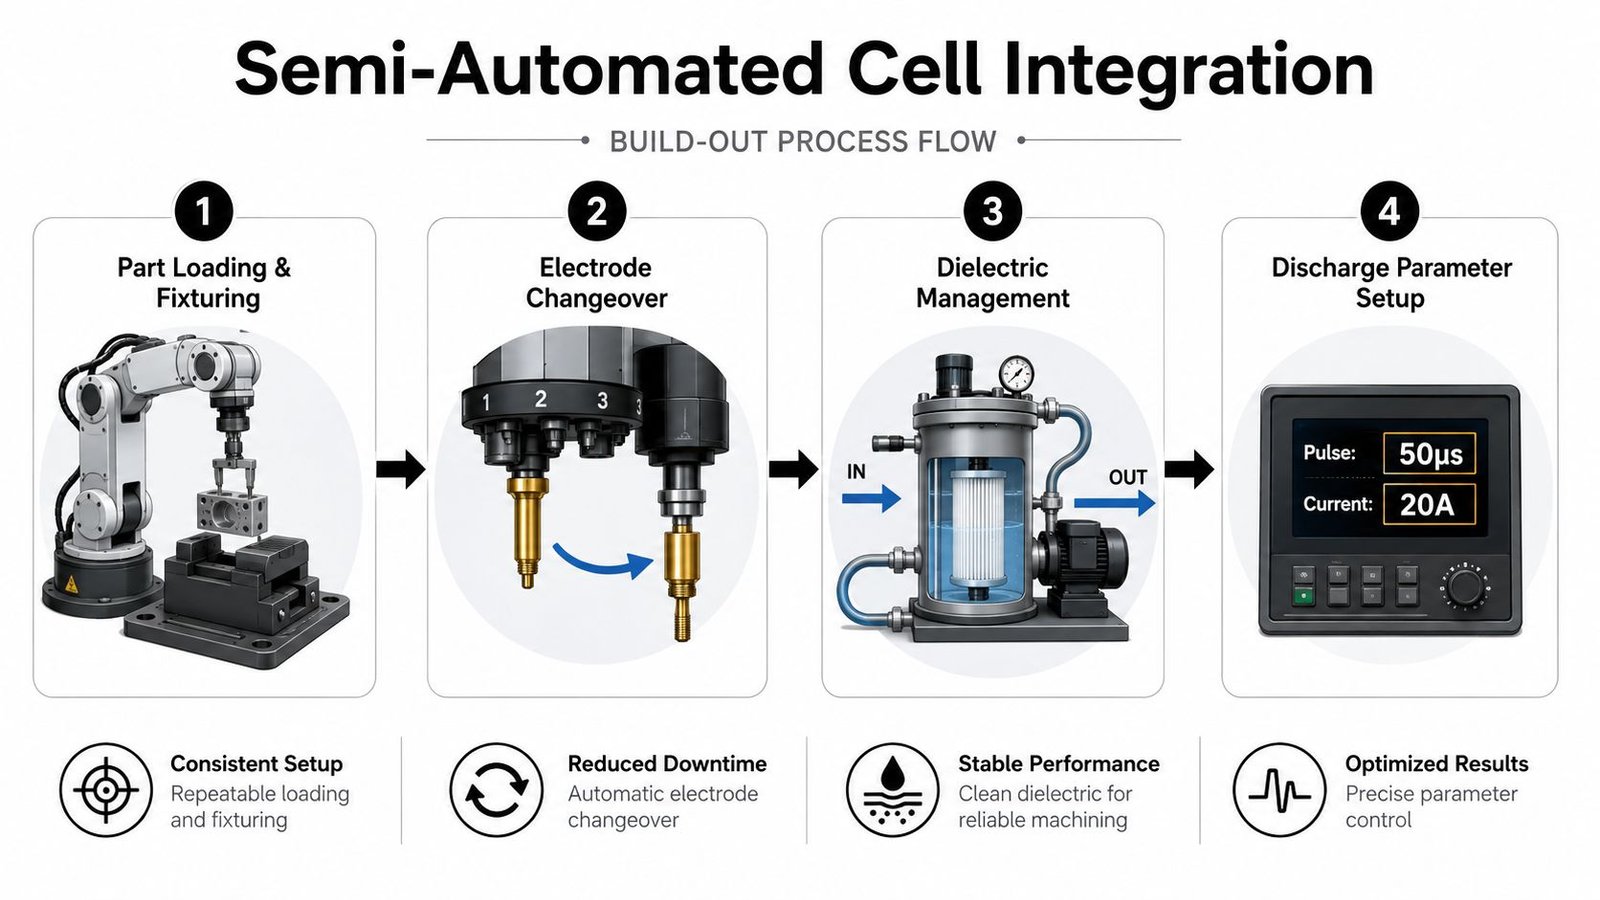
A typical sequence usually looks like this:
- Load and reference: The operator or robot places the part, clamps it, and confirms the fixture presence and zero reference.
- Select the electrode: The machine or tool changer calls the correct diameter and material from the electrode library.
- Run the process: The controller manages gap voltage, pulse settings, feed, rotation, flushing, and break detection.
- Verify completion: The machine reports cycle complete, depth reached, electrode condition, and alarm status before the next operation begins.
The machine HMI should own discharge parameters and local protection. A supervisory PLC or robot controller should manage part presence, door status, fixture confirmation, start permission, cycle-complete signals, and alarm hand-off. Keeping that boundary clear makes troubleshooting easier and prevents a cell-level sequence from overriding process-critical EDM settings.
Decide where full automation earns its place
Full automation starts to make sense when the part is highly repeatable, unattended operation is long enough to matter, and electrode consumption is predictable enough to calculate a defensible cost per hole. It makes less sense when operators frequently switch between unrelated geometries, fixtures need frequent manual adjustment, or each job requires engineering judgment.
Market summaries describe increasing use of CNC optimization, adaptive control, AI monitoring, IoT diagnostics, and predictive maintenance in EDM drilling, with claimed setup-time reductions of about 18 to 20% and downtime reductions of about 21%, as reported in small-hole EDM market coverage. Treat those figures as market-summary claims, not as a guaranteed result for your cell. Your own time study should govern the investment.
A manual popper can often be retrofitted with a pallet fixture, barcode or job-selection interface, dielectric monitoring, external robot signals, and a guarded loading station. That path preserves the machine while adding control around it. Guidance on selecting the right balance between operator involvement and automation is available in semi-automatic equipment integration.
Maintenance, Calibration, and GMP Discipline for EDM Hole Poppers
Medical-device production changes the meaning of maintenance. A dirty filter isn't only a machine-care problem if it changes dielectric flow and affects hole quality. FDA 21 CFR Part 820 includes requirements involving GMP procedures, preventive maintenance, calibration, facilities, and personnel training, as summarized in the maintenance and calibration requirements for FDA 21 CFR Part 820.
Use a schedule that produces evidence
Daily work should include dielectric level, visible contamination, filter pressure, nozzle condition, electrode guide cleanliness, and alarm review. Record the operator, machine, date, job, and any corrective action.
Weekly work should examine electrode-guide alignment, spindle or electrode rotation behavior, clamping condition, flushing consistency, and fixture wear. A guide that looks acceptable can still cause positional drift if it has accumulated damage or contamination.
Quarterly work should address power-supply verification, servo reference checks, axis behavior, spindle runout, Z-axis backlash, and the calibration status of measurement equipment. The interval itself must follow your validated procedure and risk assessment. The point is controlled evidence, not an arbitrary calendar exercise.
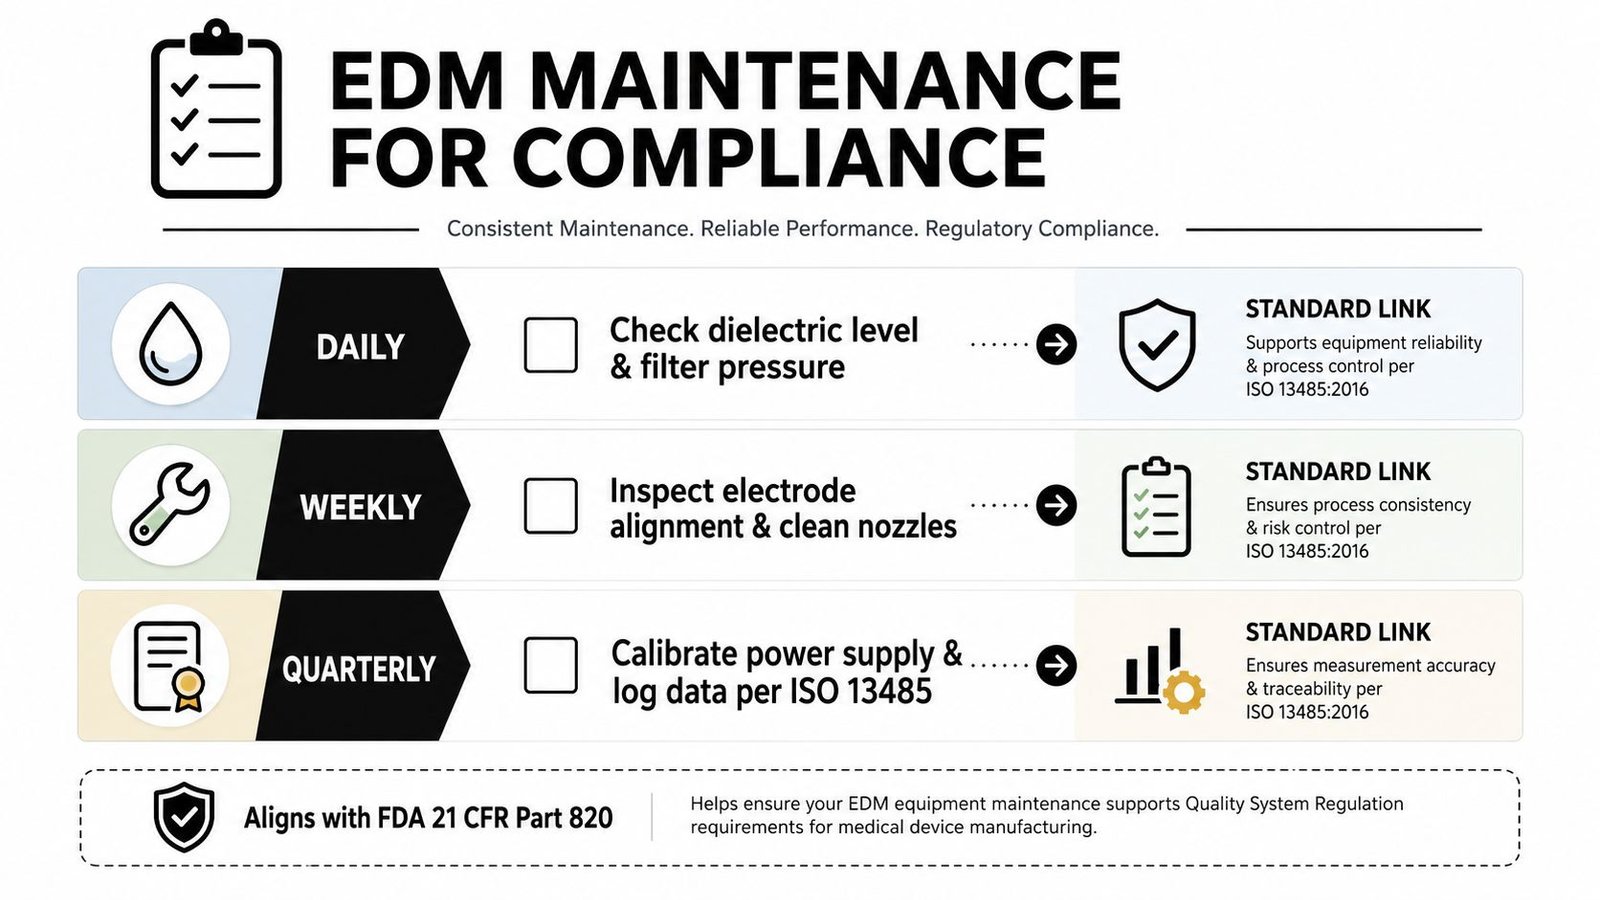
For GMP-critical equipment, maintenance teams must monitor calibration schedules, usage thresholds, and preventive tasks so the process remains traceable and validated against FDA and ISO 13485 expectations, as explained in medical-device equipment maintenance guidance. Connect each task to a record that identifies the machine, procedure revision, result, technician, disposition, and next due action.
Troubleshoot symptoms instead of guessing
- Wandering holes: Check fixture seating, electrode centering, guide wear, axis reference, and flushing balance before changing pulse energy.
- Excessive electrode wear: Review dielectric condition, pulse duration, current, electrode material, and compensation. Longer pulse duration can increase both machining speed and electrode wear, while small deep holes are especially vulnerable to accelerated wear and reduced speed, according to technical EDM process research.
- Recast-layer spikes: Confirm that discharge energy and flushing are stable, then review whether the drawing permits EDM as the final operation. A process can hold diameter while still producing unacceptable surface integrity.
Good maintenance practices should support both uptime and audit readiness. Automated manufacturing practices are most useful when they connect machine condition, process validation, and operator records instead of treating compliance as paperwork added after production.
A Practical Example of an EDM Hole Popper Cell in Action
Consider a representative 12-person job shop serving aerospace and medical customers. The shop already has wire EDM capacity, but its recurring work includes stainless injector bodies and 0.6 to 1.2 mm start holes in HRC 45 plate. Rather than purchase a second wire machine, the team adds a semi-automated hole-popper cell beside the existing equipment.
The decision rests on workflow. Wire EDM remains valuable for internal profiles, but using it as the default answer for every starter-hole requirement adds a downstream dependency and doesn't address the shop's broader small-hole demand. The team standardizes a repeatable fixture, a defined zero-reference scheme, and an electrode magazine organized by diameter and material.
They accept two disadvantages. Electrode cost per hole is higher than with a strong mechanical drilling operation, and operators need time to learn break-detection settings. In return, the cell reduces manual intervention and gives the shop a repeatable method for difficult conductive materials.
No verified production data is available for this representative scenario, so it would be misleading to assign before-and-after cycle times, scrap percentages, or labor-hour savings. A credible trial should capture those values directly:
- Cycle time per hole: Include loading, approach, discharge, retract, and electrode change.
- Scrap and rework: Record hole position, diameter, straightness, recast condition, and fixture-related defects separately.
- Operator time: Measure active handling, inspection, alarm recovery, and electrode replacement.
- Consumables: Track electrode length consumed and discarded electrodes by part family.
- Scale-up requirement: Identify whether a second pallet, larger electrode library, or automated inspection would remove the next constraint.
That measurement plan is more useful than a promotional case study because it exposes the trade-offs your own parts will create.
Making the Right Call for Your Production
Select an EDM hole popper around the hole sizes and depths you regularly repeat. Don't buy a broad catalog capability that your fixtures, inspection system, or electrode budget can't exploit. A machine that handles your dominant work consistently is more valuable than one that occasionally reaches an extreme specification.
Standardize fixtures and electrode management before pursuing full robotics. A repeatable zero reference, controlled electrode library, reliable flushing, and clear alarm handling usually create more value than automating an unstable manual process. For medical work, treat calibration and dielectric maintenance as quality-system activities because they influence validated production, not merely machine availability.
A hole popper is rarely the right investment for a single prototype or an isolated difficult hole. It becomes much easier to justify when small-hole work recurs in hardened or exotic conductive alloys and when wire EDM capacity is being consumed by starter-hole preparation.
Before speaking with an integrator or machine builder, bring part drawings, batch sizes, current cycle times, electrode consumption, fixture concepts, inspection requirements, and quality-system obligations. Ask for a process trial using your most difficult recurring hole, then compare manual, semi-automated, and fully automated approaches against the same acceptance criteria.
System Engineering & Automation provides cost-effective manufacturing solutions, including semi-automatic cells, custom tooling, fixtures, integrated controls, and manual or fully automated equipment for your production goals. Visit System Engineering & Automation to discuss an EDM hole-popper integration plan built around your part mix, quality requirements, and practical path to optimized production and service support.