Your new machine is on the floor, the team wants it live, and production is already asking when it'll start paying for itself. That's exactly when a rushed handoff gets expensive. A strong equipment commissioning checklist keeps the launch disciplined, traces every gap back to an owner, and gives your operators a real path to stable output instead of a pile of half-finished sign-offs.
For manufacturers that build custom or semi-automated systems, the point isn't just to “get it running.” The point is to protect safety, prove repeatability, and lock in the setup that supports throughput, quality, and serviceability from day one. In commissioning-heavy environments, the checklist is the control point that keeps install work, testing, and handover from blurring together, and that discipline has deep roots in building commissioning practice, where structured verification became standard rather than optional, with total commissioning cost commonly budgeted at 0.75% to 3.0% of construction cost in government guidance (VA building commissioning manual).
For teams that optimize production and services, the safest launch is rarely the fastest one on paper. It's the one where every pre-start check, every functional test, and every handoff record stands up when a line goes down six months later.
Table of Contents
- 1. Pre-Commissioning Equipment Inspection and Documentation Review
- 2. Installation, Mechanical Assembly, and Alignment Verification
- 2. Installation, Mechanical Assembly, and Alignment Verification
- 3. Electrical System Installation, Wiring, and Safety Circuit Verification
- 5. Control System Programming, Configuration, and Logic Verification
- 6. Sensor Calibration, Testing, and Signal Verification
- 6. Sensor Calibration, Testing, and Signal Verification
- 8. Documentation, Training, Handoff, Performance Optimization and Post-Commissioning Support
- 8. Documentation, Training, Handoff, Performance Optimization and Post-Commissioning Support
- 8-Point Equipment Commissioning Checklist Comparison
- From Commissioning to Continuous Optimization
1. Pre-Commissioning Equipment Inspection and Documentation Review
A machine can look ready on the receiving dock and still be unfit for startup. Before anyone energizes a cabinet, connects utilities, or loads code, the asset has to be checked against the purchase order, the drawing set, and the process it is supposed to serve.
The first pass is about traceability, not speed. Verify the machine identity, serial number, revision status, location, and reference documents before the build advances any farther. That level of control is built into standard commissioning practice, where asset records tie a specific unit to its tag, description, P&ID reference, location, and revision history, rather than leaving the team to sort out a generic model after installation begins (commissioning checklist template; ISO 55000 asset management overview). For GMP-aware manufacturers, missing calibration certificates, undocumented substitutions, and mismatched part numbers are caught before they turn into audit problems or delayed handoff.
A clean inspection file should confirm:
- Purchase and build match: Serial numbers, part numbers, and shipped components match the original order.
- Condition on arrival: Photograph transport damage, missing items, and packaging issues right away for warranty support.
- Documentation completeness: Collect manuals, maintenance docs, circuit diagrams, spare parts lists, and as-installed drawings before sign-off.
- Quality and regulatory traceability: Confirm certificates, approvals, and revision records are present so the team is not rebuilding history later from incomplete paperwork.
This step protects ROI because it prevents avoidable rework. If a wrong component, a missing drawing, or a substituted device is discovered after installation starts, the schedule slips, the troubleshooting time grows, and the commissioning team ends up paying for mistakes that should have been caught at receipt.
2. Installation, Mechanical Assembly, and Alignment Verification
A machine can arrive in good condition and still be out of tolerance once it is set on the floor. Concrete varies, anchor points shift, and the field installation rarely matches the drawing package exactly. Installation and alignment have to be measured on site, because a small offset at this stage becomes vibration, wear, and repeat adjustment later.
For custom tooling, conveyors, and pick-and-place systems, the installation sequence often decides whether the asset runs within tolerance or drifts out over time. The checklist should capture bolting, leveling, torque values, assembly order, and guard installation before the system moves into electrical checkout or functional testing. That discipline also supports the way a control panel is laid out and serviced, since access, cable routing, and interface points affect how accurately the machine can be assembled and maintained later, as reflected in automation control panel design guidance.
Verify the mechanics with instruments, not assumptions
Use the right tools for the job:
- Dial indicators and laser alignment tools: Confirm linearity, parallelism, and repeatability on critical moving parts.
- Precision levels: Verify machine base and frame leveling before alignment tuning.
- Torque records: Capture torque on anchor bolts, guards, and structural connections where loosening would affect motion or safety.
- Photo documentation: Record critical assemblies, cable routing, and fixture interfaces for future troubleshooting.
Alignment checks also need to reflect the machine's operating behavior, not just its static position. A frame can look square and still bind under load if mating surfaces were forced during assembly or if one support point was left high. ISO machinery installation guidance emphasizes controlled mounting, correct alignment, and verification of geometry so the equipment starts in a condition that supports repeatable performance and safer operation (ISO 20607 machinery instruction and installation guidance).
The practical value is simple. A line that is bolted down correctly, shimmed properly, and aligned with the process path will hold settings longer, reduce premature wear, and cut the kind of troubleshooting that burns time after handoff. That is especially true in semi-automated systems, where a small mechanical error can create downstream stoppages that look electrical or software-related until someone checks the base installation.
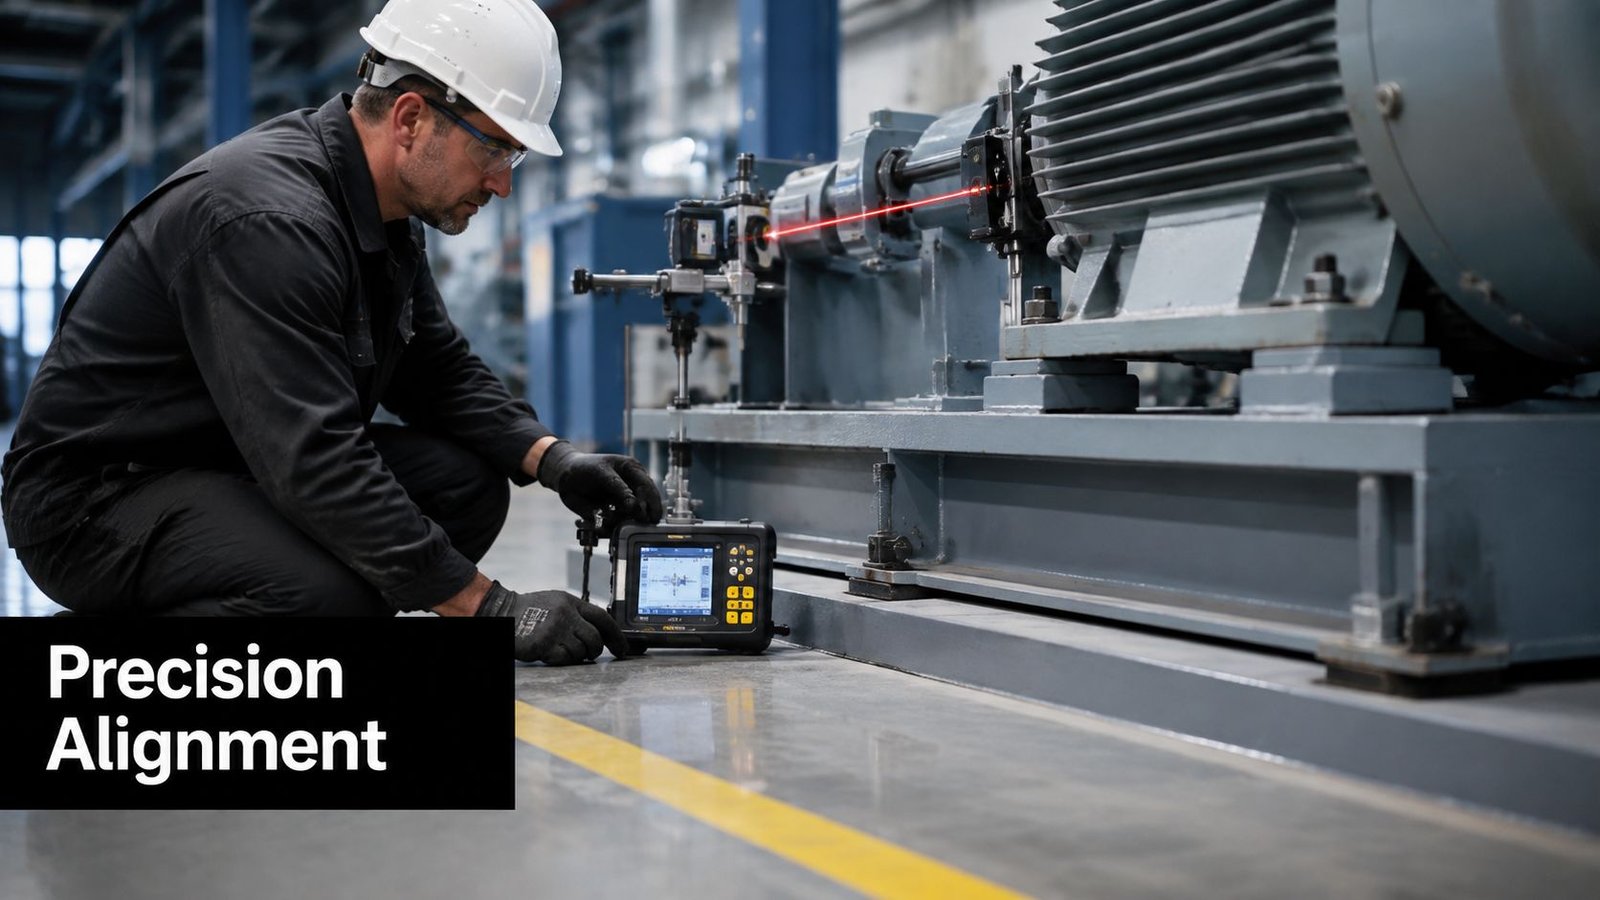
A medical device assembly machine with misaligned pick-and-place hardware can damage product before the control system detects a fault. A semi-automated conveyor with a poor level set can create rollback, misfeeds, or jamming that operators end up fixing manually, which only pushes the problem downstream. The better move is to validate the mechanical base now so the later electrical and software checks mean something.
Quiet does not always mean correct. A machine can sound stable and still be carrying a twist, a bind, or a load path that will show up later as drift, wear, or intermittent faults.
The trade-off is time. Field adjustment usually takes longer than a clean factory drawing suggests. Build that buffer in, because real sites need real corrections, and every minute spent tightening the mechanical base now usually saves hours of troubleshooting after launch.
3. Electrical System Installation, Wiring, and Safety Circuit Verification
A line can look ready and still be one loose terminal away from a shutdown or an incident. Electrical commissioning is where the team proves the cabinet, field wiring, grounding, and safety circuits will hold up under real operating conditions. If the interlock logic is wrong, or the emergency stop chain does not fail safe, every later check sits on a weak base.
For semi-automated equipment, that proof matters because operators work close to moving parts and live controls. The electrical phase should confirm cable routing, grounding, protective devices, and signal integrity before main power goes on. It also forces the team to verify the safety chain instead of assuming the panel build is enough. If your control panel architecture still needs refinement, the integration work has to support the commissioning sequence from the start, which is why many manufacturers keep a dedicated reference for control panel design and commissioning alignment.
A good start is to test the protections in the order they will matter in the field.
- Grounding and bonding: Confirm the machine frame is bonded to the main ground and verify grounding resistance according to site requirements.
- E-stop circuits: Test every emergency stop button, series loop, and safety relay before energizing the main system.
- Interlocks and guards: Prove that doors, covers, and access points block unsafe operation when open.
- Cable and terminal labeling: Label every wire and terminal so troubleshooting doesn't depend on memory.
- Insulation resistance: Check motor and control wiring before power-up to catch hidden damage or installation defects.
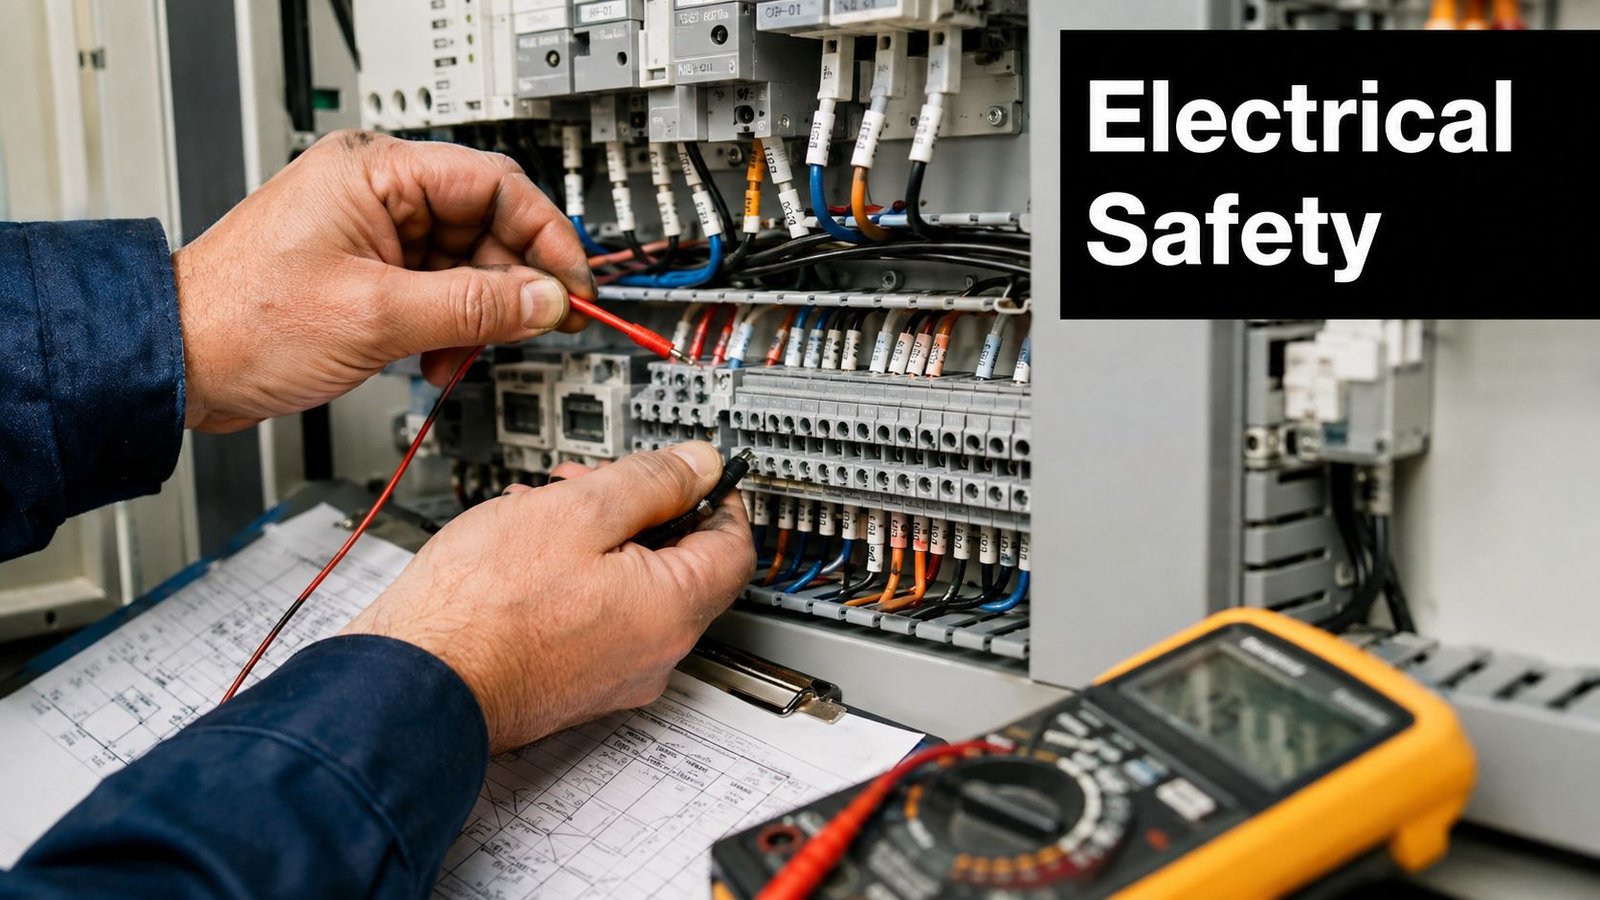
The cost of a bad electrical start usually shows up in layers. First comes lost time, then damaged hardware, then a safety review that slows the entire launch. Signal quality matters too, especially when VFDs, encoders, and shielded cables share the same machine envelope. If the team checks the circuit path now, later faults are easier to sort into the right bucket, mechanical, software, or wiring.
Experienced commissioning teams treat this phase as a proof exercise. They do not apply power until the safety chain, ground path, and control signals behave the way the machine is supposed to behave.
5. Control System Programming, Configuration, and Logic Verification
A machine can pass mechanical inspection and still fail in production if the control logic is built on assumptions instead of the actual build. PLC code, HMI screens, motion profiles, and I/O mappings have to match the actual machine, the actual sensors, and the actual sequence operators will run. At this stage, commissioning moves from basic power-up checks to proving that the system behaves the way production needs it to behave.
I start by locking down the program version, the I/O list, and the machine state before anyone makes commissioning edits. That record matters when a fault shows up later, because it helps separate a code issue from a wiring problem or a hardware mismatch. It also protects the project schedule. If no one can tell what changed, troubleshooting drags and the line sits idle longer than it should.
The order of testing should follow how the machine is used. Single functions come first, then combined sequences, then full-cycle operation under realistic conditions. A partial success can hide a logic defect if the program never gets pushed through the full operating path. That is where wasted scrap, rework, and avoidable maintenance calls usually start.
Verify the control logic the way production will experience it
Useful checks include:
- Baseline code control: Save a clean program version before commissioning edits start.
- I/O matching: Verify inputs, outputs, and parameters against the actual hardware.
- Sequence testing: Validate one function at a time before combining them into multi-step cycles.
- Fault logic: Force sensor failures, timeout conditions, and illegal input combinations to confirm the system responds safely.
- Readable documentation: Keep flowcharts or ladder logic notes clear enough for maintenance and operators to use later.
Before the machine reaches handoff, the control team should also confirm how the software side fits the hardware side. The point is to avoid a split between what the code expects and what the machine can do. For teams that need tighter integration between mechanical build, controls, and software changes, hardware and software integration guidance helps keep that work aligned with the machine architecture.
One practical trade-off shows up here. A team can move fast and accept rough logic notes, or it can slow down long enough to document the sequence cleanly and test fault recovery in a controlled way. The second path takes more effort up front, but it reduces the risk of production stops, unsafe starts, and maintenance guesswork after turnover.
If the machine has motion control, recipe handling, or operator prompts, verify those functions under the same conditions production will face. Screen text, button behavior, access levels, and alarm handling all need to support the actual job, not just a clean demo run. A good commissioning record should show what was programmed, what was configured, what was tested, and what still needs tuning after the first production runs.
6. Sensor Calibration, Testing, and Signal Verification
A line can pass a dry run and still ship bad parts if the sensors are off. That happens when a prox switch drifts, a load cell reads high, or a vision camera is mounted in a way that looks fine on the bench but fails in production. The control system then makes decisions on weak evidence, and the result is unstable output, avoidable scrap, and more time spent troubleshooting after handoff.
The cleanest way to prevent that is to verify every sensor against a known reference before the machine is signed off. A good commissioning plan records the baseline, checks the operating range, and confirms that each signal stays stable under real conditions. That baseline also gives maintenance a reference point later, which is why many teams fold sensor verification into factory acceptance tests before the line leaves the build stage.
Check the signal, then check the installation
Start with the device itself, then move to the way it is mounted and read by the control system.
- Sensor inventory: Record each device, its calibration status, and the expected range.
- Reference checks: Use gauge blocks, pressure references, temperature baths, or other known standards where the application calls for them.
- Range testing: Confirm behavior at low, nominal, and high points, not only in the middle of the span.
- Signal stability: Watch for noise, dropout, and drift on a logger, meter, or oscilloscope.
- Mounting quality: Verify orientation, shielding, cable routing, and protection from spray, heat, or vibration.
A vision system often exposes the weak link first. If the camera is aligned to a polished test piece in a controlled room, it may still miss parts once lighting shifts or dust builds up on the lens. The same logic applies to temperature probes and load cells, where a clean reading in isolation means little if the sensor response changes under process heat, machine vibration, or repeated cycling.
Pay close attention to the gaps between sensor output and PLC logic. A signal can be electrically present and still be wrong in practice if scaling, thresholds, or debounce settings do not match the machine's actual behavior. That kind of mismatch is expensive because it creates false passes, false rejects, and intermittent faults that only appear after production starts.
A practical test is to force each sensor through the condition it is supposed to detect, then hold it there long enough to see whether the reading stays consistent. If a part presence input flickers, or a clamp confirmation changes state before the mechanism fully closes, the machine is not ready for turnover. Teams that treat these checks as a formality usually pay for it later in rework, downtime, and operator distrust.
6. Sensor Calibration, Testing, and Signal Verification
Sensors are the evidence layer for the machine. They tell the control system whether a part is present, whether a clamp has reached force, whether a process has drifted, and whether a defect should be rejected. If that input is noisy or miscalibrated, the line can look acceptable while still producing unstable results.
Commissioning teams need to be exact here. A proximity switch, vision system, temperature probe, or load cell is not ready until it has been checked against a known reference and then confirmed across the operating range. That baseline matters later, which is why many teams record the first stable readings as part of the equipment commissioning checklist guidance.
Verify every signal against a known standard
Strong practice includes:
- Sensor inventory: List each device, its calibration date, and the acceptable range.
- Reference checks: Use gauge blocks, pressure references, or temperature baths where appropriate.
- Range testing: Test at low, nominal, and high conditions, not just in the middle of the range.
- Signal stability: Watch for noise, dropout, and drift on a logger or oscilloscope.
- Mounting quality: Confirm orientation, shielding, and protection from spray, heat, or vibration.
A vision inspection system in medical device assembly can look reliable on a demo floor and still struggle once lighting changes, part finish varies, or background reflections shift on-site. Field verification matters more than the spec sheet alone. The sensor has to survive the actual process, not the ideal version of it.
Practical rule: Calibration is only half the job. The signal has to stay stable when the machine is running, vibrating, and warming up under load.
Maintenance work gets easier when commissioning leaves a clear baseline. If a pressure transducer or encoder drifts out of tolerance, the team can tell whether the issue is new, installation-related, or part of a slow change over time. That reduces guesswork and keeps technicians from opening the wrong subsystem first.
In custom and semi-automated systems, this step often aligns with formal factory acceptance tests because the goal is not just to prove the sensor works in isolation. The goal is to confirm that the input stays trustworthy under the same conditions the machine will face in production, where false triggers, missed detections, and unstable readings turn into downtime and scrap.
8. Documentation, Training, Handoff, Performance Optimization and Post-Commissioning Support

A machine is not handed over just because it cycles once. It is ready only when the people who own it can run it, maintain it, troubleshoot it, and improve it without calling the original build team for every decision. That handoff has to cover documentation, training, maintenance planning, and a support plan for the period after startup.
The cleanest closeout process treats handover as a real project phase. Open defects should be listed clearly, owners should be named, retest dates should be assigned, and operations readiness should be confirmed before anyone signs off. That approach fits manufacturers because the first production problems usually appear after the first shift, not during the final meeting. Good ownership guidance also keeps the team focused on what still needs action instead of treating a signature as the finish line (equipment commissioning checklist ownership guidance).
Documentation has to be usable on the floor, not just complete in a folder. Operators need the procedures they will follow, maintenance staff need the drawings and service notes they will open under pressure, and supervisors need a clear record of what was tested and what remains under watch. The transfer package should also include a maintenance schedule, spare parts list, and quick-reference sheets for startup, shutdown, and changeover. If the plant uses a formal reliability program, SMRP standards and maintenance practices are a better fit for structuring that handoff than a loose checklist copied from the build phase.
Training should match actual work, not a generic demo. A strong session covers normal operation, fault response, lockout steps, basic troubleshooting, and the limits of operator intervention. The goal is to keep line staff from making improvised fixes that hide problems and create new downtime later. I have seen a machine run well in the builder's hands and fail in the plant because the team never got clear guidance on when to stop, who to call, and what evidence to record.
Post-commissioning support should be planned before startup, not after the first complaint. That support may include a short stabilization window, a defined response path for repeat faults, and a review of cycle data once the machine is running in production. For custom and semi-automated systems, that review often reveals small adjustments that improve uptime, reduce scrap, or remove a bottleneck that did not show up during the test run. The point is to protect the ROI of the commissioning effort, because a machine that is technically accepted but poorly supported can still become a daily source of waste.
Performance optimization belongs in the handoff plan as well. Once the line has enough runtime, the team should compare actual cycle behavior, operator interventions, and maintenance findings against the original acceptance criteria. That is where the process shifts from proving the machine works to making sure it keeps working at the level the plant needs. When the documentation is clear, the training is grounded, and the support rhythm is defined, the commissioning work holds its value long after the first handoff.
8. Documentation, Training, Handoff, Performance Optimization and Post-Commissioning Support
A machine is not commissioned just because it runs once. It's commissioned when the people who own it can operate it, maintain it, troubleshoot it, and improve it without depending on the original build team for every question. That's why handoff has to include documentation, training, maintenance planning, and a post-launch support rhythm.
The strongest guidance treats handover as its own phase. It should confirm open defects, named owners, retest dates, and operations readiness instead of assuming a signature means the work is over (equipment commissioning checklist ownership guidance). That's a better model for manufacturers because production problems usually show up after the first shift, not during the final acceptance meeting.
Make the handoff usable, not ceremonial
A strong closeout package includes:
- Operating and maintenance manuals: Give operators and maintenance staff the documents they'll use.
- Training records: Show who was trained, when, and on what tasks.
- Spare parts list: Include part numbers, suppliers, and critical replacements.
- Maintenance schedule: Define inspection intervals and replacement criteria while the engineering team is still available.
- Quick-reference guides: Use laminated or digital startup, shutdown, and changeover sheets.
A commissioning framework for manufacturing often also adds OEE baseline recording and PM schedule setup, which is exactly the right direction for teams that want the asset to stay productive after launch (equipment commissioning checklist guidance). That shift matters because acceptance should cover sustainment, not just startup.
Practical rule: If an operator can't solve a common issue without searching through three folders, the handoff isn't done.
Post-commissioning support is where small fixes pay off. A follow-up call after one week, then another after one month, then again after three months gives the team a chance to tune settings, close documentation gaps, and correct ergonomic problems before they harden into daily workarounds. That's also when you can compare the baseline cycle time, scrap rate, and downtime against the actual operating pattern and decide what to refine next.
8-Point Equipment Commissioning Checklist Comparison
| Item | Implementation Complexity 🔄 | Resource Requirements & Speed ⚡ | Expected Outcomes ⭐📊 | Ideal Use Cases | Key Advantages 💡 |
|---|---|---|---|---|---|
| Pre-Commissioning Equipment Inspection and Documentation Review | Low–Medium 🔄: checklist-driven, procedural | Moderate ⚡: quality engineers, document access; quick to start | ⭐ High, compliance, early issue detection; 📊 reduces rework | Incoming equipment for GMP/regulated projects | Establishes audit trail; prevents missing/incorrect components |
| Installation, Mechanical Assembly, and Alignment Verification | High 🔄: precision assembly and on-site adjustment | High ⚡: skilled mechanics, laser/dial tools, fixtures | ⭐ High, reliability and repeatable tolerances; 📊 lower downtime | Precision machinery, conveyors, tooling integration | Prevents vibration/wear; ensures dimensional accuracy |
| Electrical System Installation, Wiring, and Safety Circuit Verification | High 🔄: code-compliant, safety-critical work | High ⚡: certified electricians, schematics, test instruments | ⭐ High, operator safety and reliable power/control; 📊 code compliance | Machines with E-stops, interlocks, high-voltage power | Prevents shocks/fires; ensures grounding and fail-safe circuits |
| Pneumatic and Hydraulic System Commissioning | Medium–High 🔄: pressure tuning, leak detection | Medium ⚡: pneumatics/hydraulics techs, gauges, filtration | ⭐ Medium–High, consistent force/speed; 📊 improved actuator life | Presses, clamps, high-force actuation systems | Repeatable force control; cost-effective high-force solutions |
| Control System Programming, Configuration, and Logic Verification | High 🔄: complex logic paths and integration testing | High ⚡: PLC/HMI programmers, testers, version control | ⭐ High, deterministic operation and data logging; 📊 safer automation | Automated sequences, safety interlocks, data-integrated lines | Prevents logic faults; enables diagnostics and future updates |
| Sensor Calibration, Testing, and Signal Verification | Medium 🔄: calibration routines and environmental checks | Medium ⚡: calibration standards, scopes/data loggers, trained techs | ⭐ High, accurate measurements and fewer false triggers; 📊 supports traceability | Vision systems, load cells, pressure/temperature sensing | Ensures measurement accuracy; supports GMP calibration records |
| Functional Testing, Cycle Verification, and Throughput Validation | Medium–High 🔄: end-to-end cycle runs and data capture | High ⚡: test materials, operators, time, data analytics | ⭐ High, validated throughput and quality; 📊 baseline for acceptance | Factory acceptance, production ramp-up, acceptance tests | Confirms performance to spec; identifies tuning needs early |
| Documentation, Training, Handoff, Performance Optimization & Post-Commissioning Support | Medium 🔄: administrative plus continuous improvement | Medium–High ⚡: trainers, tech writers, support engineering | ⭐ High, sustained performance and reduced downtime; 📊 continuous gains | Long-term operations, regulated environments, complex plants | Transfers knowledge; preventive maintenance and ongoing optimization |
From Commissioning to Continuous Optimization
A successful commissioning process isn't the finish line, it's the foundation for sustained production excellence. The checklist gets your equipment started safely, but the true value comes from how well the line stays stable, how quickly your team resolves exceptions, and how consistently your maintenance plan protects the baseline you worked to establish.
That's why the best manufacturers treat commissioning as a phased project, not a single event. Pre-delivery checks protect the build. Installation and electrical verification protect safety. Controls, sensors, and functional testing protect repeatability. Handoff and post-commissioning support protect ROI. When those steps are tied together, your equipment doesn't just pass inspection, it supports quality, efficiency, and serviceability over the long run.
For manufacturers implementing custom or semi-automated systems, this discipline pays off in a very practical way. Your operators get clearer procedures. Your maintenance team gets better records. Your quality group gets a traceable baseline. And your production leadership gets a machine that's easier to optimize instead of one that needs constant rescue.
Partnering with an experienced system integrator like SEA gives you a team that understands this whole arc, from design intent to startup support. SEA builds cost-effective automation and engineering solutions for manufacturers that need better quality, better efficiency, and practical results, including semi-automatic systems, custom tooling, fixtures, and integrated controls. If you're planning a launch and want a commissioning process that protects safety while improving throughput, visit System Engineering & Automation and talk with a team that can help you get the handoff right the first time.