You're short on output, an order is due, and the line looks busy everywhere except at the end, where finished units arrive too slowly. Operators blame the press. Maintenance blames part presentation. Someone suggests buying a faster machine, but nobody can show which station sets the pace.
That's the most expensive way to buy assembly line equipment. I would start with a stopwatch, not a quote. Time each station, find the constraint, check whether it's machine time, handling, inspection, or waiting, then match the equipment to that task. You'll often spend less, keep flexibility you still need, and avoid automating a step that was never the bottleneck.
Table of Contents
- Core Types of Assembly Line Equipment
- Choosing the Right Automation Level
- How to Match Equipment to Goals and Budget
- Workstation Design That Lifts Output
- Measuring ROI as Your Line Scales
- GMP and Quality Requirements for Medical Device Lines
- Decide Whether You Need an Engineering Partner
Core Types of Assembly Line Equipment
Follow one housing through your line. It arrives on a conveyor, stops at a bench, gets clamped in a fixture, receives fasteners with a powered driver, passes a sensor check, then leaves on a cart or pallet. Each category of assembly line equipment answers a different question along that trip. Where does the part sit? Who touches it? What sets the pace? What proves the step happened?
That architecture isn't new. The Henry Ford collection record notes that Ford's Highland Park plant in Michigan introduced the moving line in 1913, first for flywheel magnetos in April, then for engines, transmissions, and complete Model T chassis. By early 1914, integrated lines produced a finished Model T in approximately 93 minutes, compared with about 12.5 hours using stationary methods.
What a Part Meets, in Order
Conveyors set pace and spacing. A belt or chain line forces a rhythm, while a roller conveyor lets operators pull work forward. Choose based on whether you want the line to push production or buffer variation between stations.
Workstations fix reach zones, seating or standing height, lighting, and tool position. They're where output is won or lost through thousands of small reaches. Fixtures hold the part in one repeatable position so pressing, welding, or fastening lands in the same place every cycle. Without that, operator skill becomes your process control.
Custom tooling shapes an operation around one part. It costs more than a generic tool, but it can prevent wrong orientation, control torque, or combine two motions into one. Integrated controls, usually PLCs with sensors, sequence actions, count cycles, and interlock steps so a press won't fire until a part-present sensor confirms the part is seated. Material handling clears finished goods through palletizing, lifts, carts, and transfer stations, so completed work doesn't pile up and block the last operator.
| Equipment | Job on the line | Typical use |
|---|---|---|
| Conveyor | Moves parts or subassemblies between stations at a set pace | Powered belt, chain or roller lines |
| Workstation | Gives operators a fixed place with reach zones, tools and seating | Manual or semi-automatic assembly |
| Fixture | Holds the part in a repeatable position during an operation | Pressing, welding, fastening |
| Custom tooling | Shapes the operation around one part or one process | Tailored to a specific task |
| Integrated controls | Sequences, counts and interlocks machine actions | PLCs, sensors, part-present checks |
| Material handling | Moves finished goods or pallets to the next process | Palletizing and end-of-line transfer |
Before you price anything, walk your line with this list. Mark which categories you already have, which are makeshift, and which one sits at your bottleneck. A missing fixture and a slow conveyor can look identical from the aisle, but they need completely different money.
Choosing the Right Automation Level
Manual, semi-automatic, and fully automated aren't good, better, and best. They're three points on one spectrum, and the right point shifts with volume per shift, product change frequency, operator judgment, and quality risk. Paying for full automation on a product that changes every quarter is how plants end up with an expensive line they run in manual mode.
The hierarchy below shows the operator's role at each level.
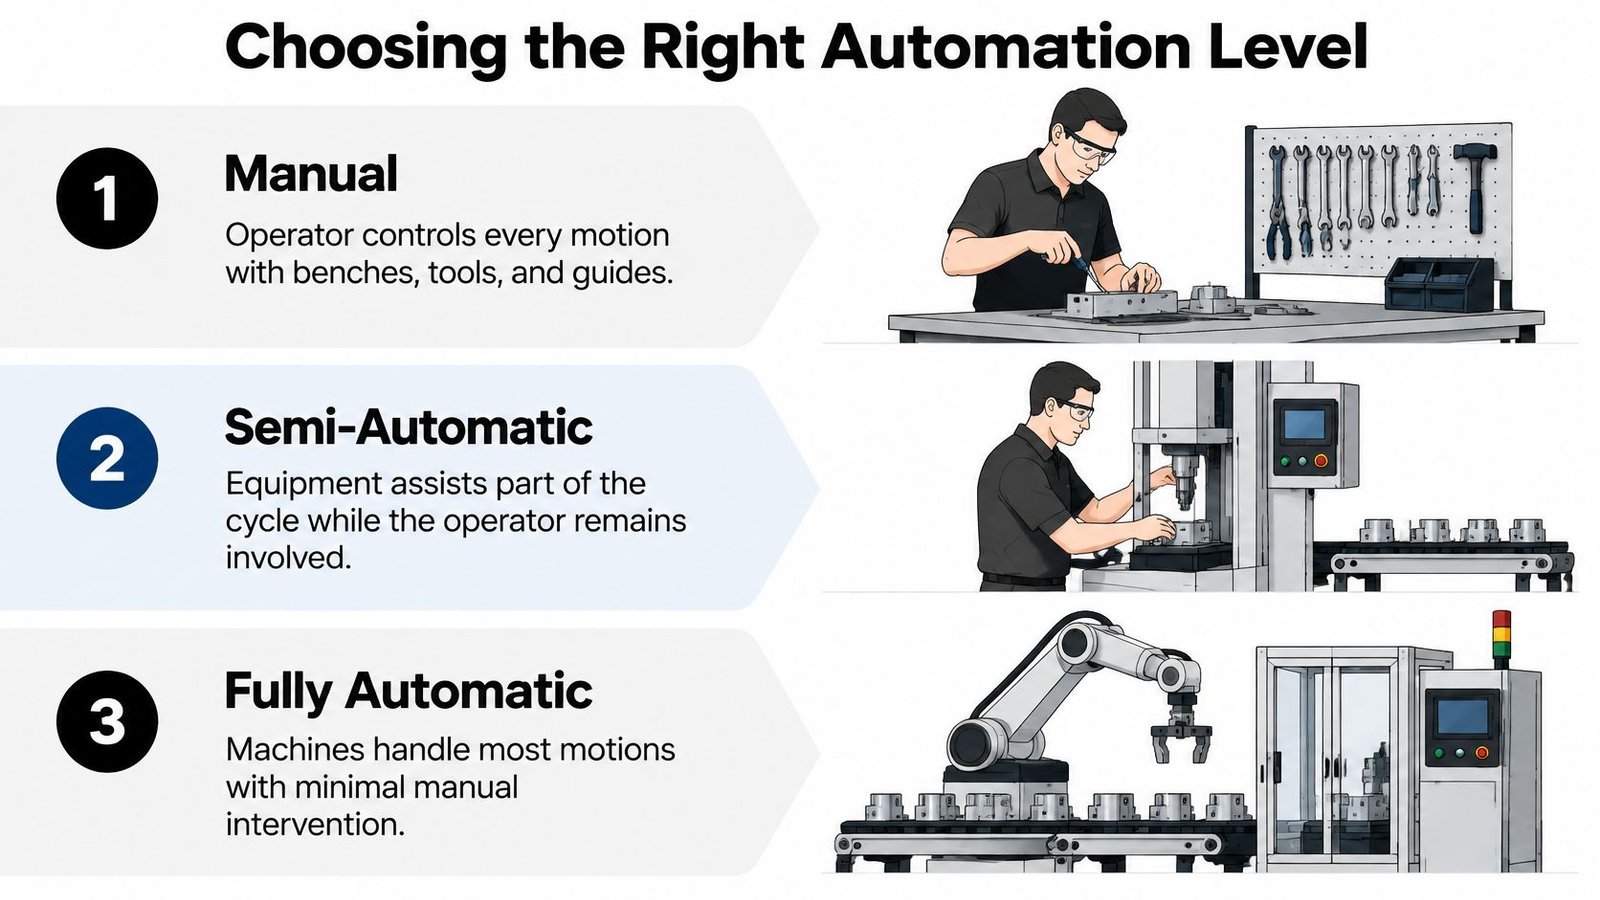
Where Each Level Fits
Manual equipment keeps the operator in control of every motion, supported by benches, hand tools, guides, and fixtures. It's the right choice for low volume, frequent changeovers, and tasks needing judgment, such as routing a flexible harness or judging a cosmetic finish. Your cost is mostly labor and your flexibility is high.
Semi-automatic equipment splits the cycle. In a table-top system, the operator loads parts and starts the cycle while automated components press, dispense, test, label, or assemble, then the operator removes the finished piece. Because it automates specific tasks rather than an entire line, development and integration costs are significantly lower. That's the sweet spot when one repetitive step, a press fit, a torque sequence, a leak test, is both the constraint and the quality risk.
Fully automated equipment runs cycles with minimal operator involvement. It earns its cost at high, stable volume with few product changes, where labor dependency and variation matter more than flexibility.
| Automation level | Operator role | Best-fit conditions |
|---|---|---|
| Manual | Controls every motion with benches, tools and guides | Low volume, frequent product changes, high judgment needed |
| Semi-automatic | Loads parts and starts a cycle while automated components press, dispense, test or label | Medium volume, one repetitive step is the constraint |
| Fully automated | Monitors cycles with minimal involvement | High, stable volume with few product changes |
Don't specify a level before you balance the work. Research on assembly-system design published in ScienceDirect found that detailed task-time assignment with balancing and sequencing increased productivity by approximately 15% while also minimizing operator fatigue for a critical drilling task. A fast machine fed by a poorly balanced manual task still waits.
Practical rule: Automate the demonstrated constraint, not the station that's easiest to automate.
The upgrade path should stay open. Start manual, add guided tooling and part-present sensors when demand grows, then convert the constraint station to semi-automatic. If your output swings widely day to day, keep manual flexibility and improve the workstation first. If the same step fails, fatigues operators, and limits every shift, that step has made the case for automation.
How to Match Equipment to Goals and Budget
Run this sequence on your own line before you request a single quote. It takes a stopwatch, a spreadsheet, and one honest shift of observation. The flow below compresses it into four decision points.
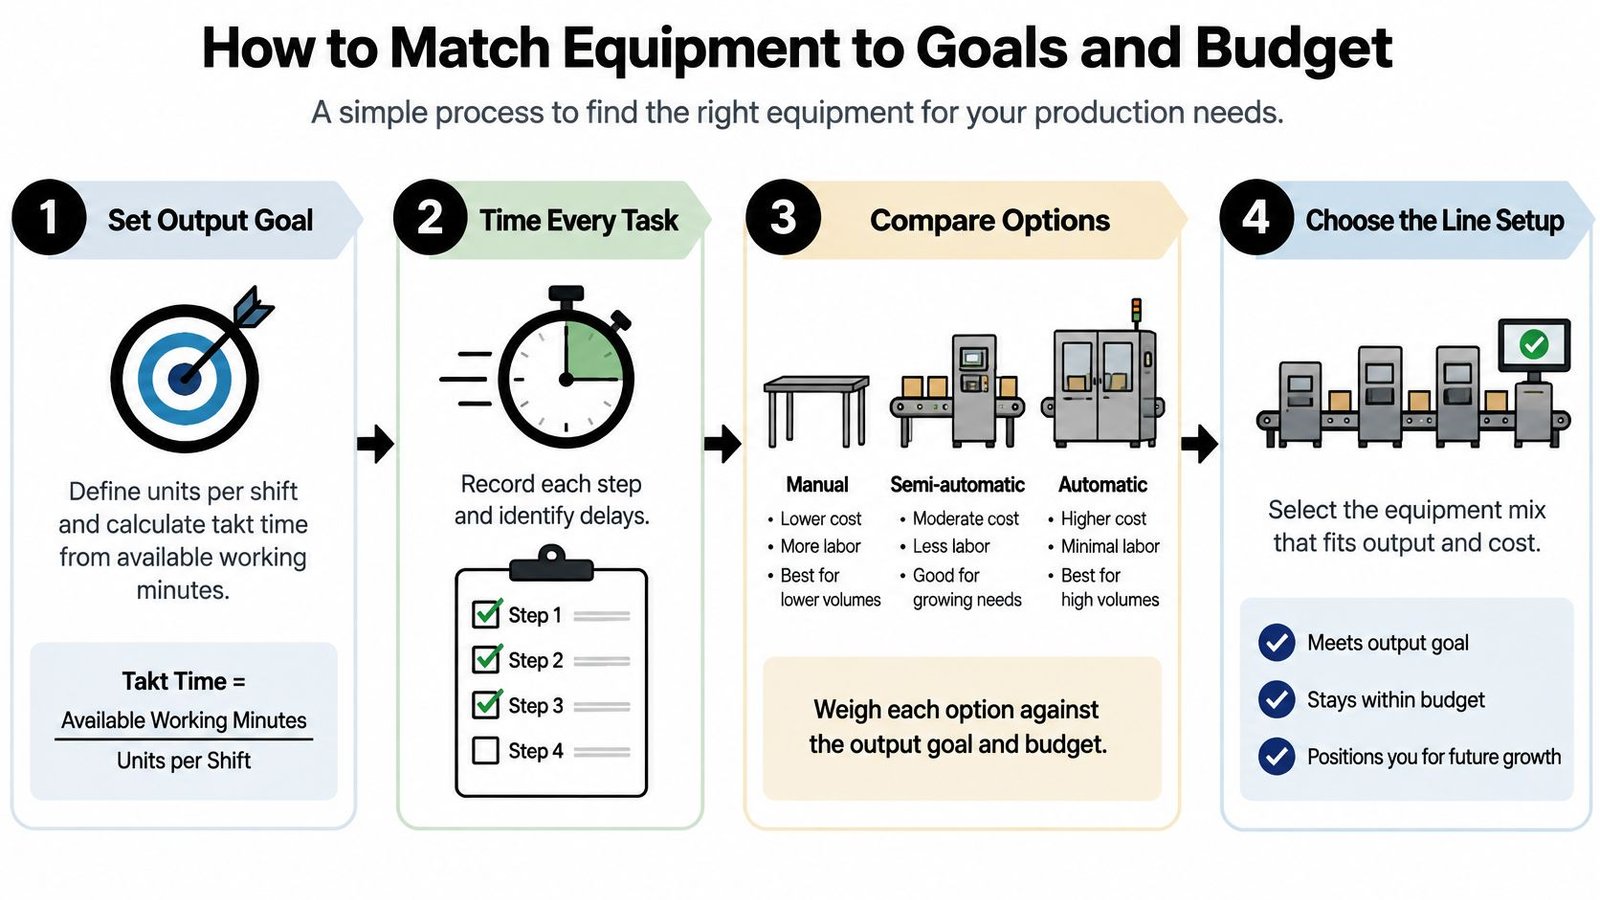
The Seven Steps
Set the output goal and calculate takt time. Divide available working minutes per shift by required good units, after breaks and planned stops. If you need 400 units in 420 productive minutes, your takt is just over one minute per unit. The common error is using the full shift length, which makes every station look fast enough on paper.
Time every task at every station. Record loading, orientation, fastening, inspection, labeling, replenishment, and changeover, not just machine cycle. Time enough cycles to see variation, not just the best operator's best run. The error here is quoting a machine's nameplate speed while the operator spends longer loading it than it spends running.
Find the constraint. It's the station with the longest total time, the widest variation, or the queue building in front of it. Sometimes it's not assembly at all. It's inspection or packing. Don't guess from noise or activity. The busiest-looking station isn't always the slowest.
Rebalance before you buy. Move work elements between stations so the longest station sits below takt with an allowance for variability, fatigue, and minor delays. Moving one inspection task upstream or splitting a fastening sequence can recover capacity for free. Skipping this step means paying for equipment to fix a staffing layout problem.
Score each constraint task for automation. Rate repetition, precision need, ergonomic risk, and quality impact. A task that's repetitive, force-sensitive, and defect-prone scores high. A task needing visual judgment on changing parts scores low. This stops you automating what's merely annoying instead of what limits good output.
Match candidates to equipment in cost order. Try fixtures and guided tooling first, then a semi-automatic cell for the scored task, and reserve full automation for proven, stable volume. Understanding what tooling costs include helps here, because design, build, and tryout often matter as much as the hardware price. The error is jumping to the largest system because it promises to solve everything at once.
Set the budget range, then compare cost per good unit. Divide total installed cost by expected good units over the equipment's useful life, not by units started. Include controls, installation, commissioning, spares, and training. A cheaper station with poor yield can cost more per good unit than a pricier one that prevents defects.
Final Check Before You Commit
- Takt confirmed: Longest station time is below takt with allowance.
- Constraint proven: Queue, time data, and quality data point to the same station.
- Level justified: Repetition and volume support the automation level chosen.
- Budget complete: Tooling, controls, installation, and commissioning are included.
- Flexibility preserved: Changeover for your real product mix still works.
If any box stays unchecked, you're not ready for a quote. You're ready for more measurement, and that's cheaper.
Workstation Design That Lifts Output
A workstation redesign can return capacity before you spend on automation. This operator's powered driver, part position, and reach pattern show where seconds hide in plain sight.
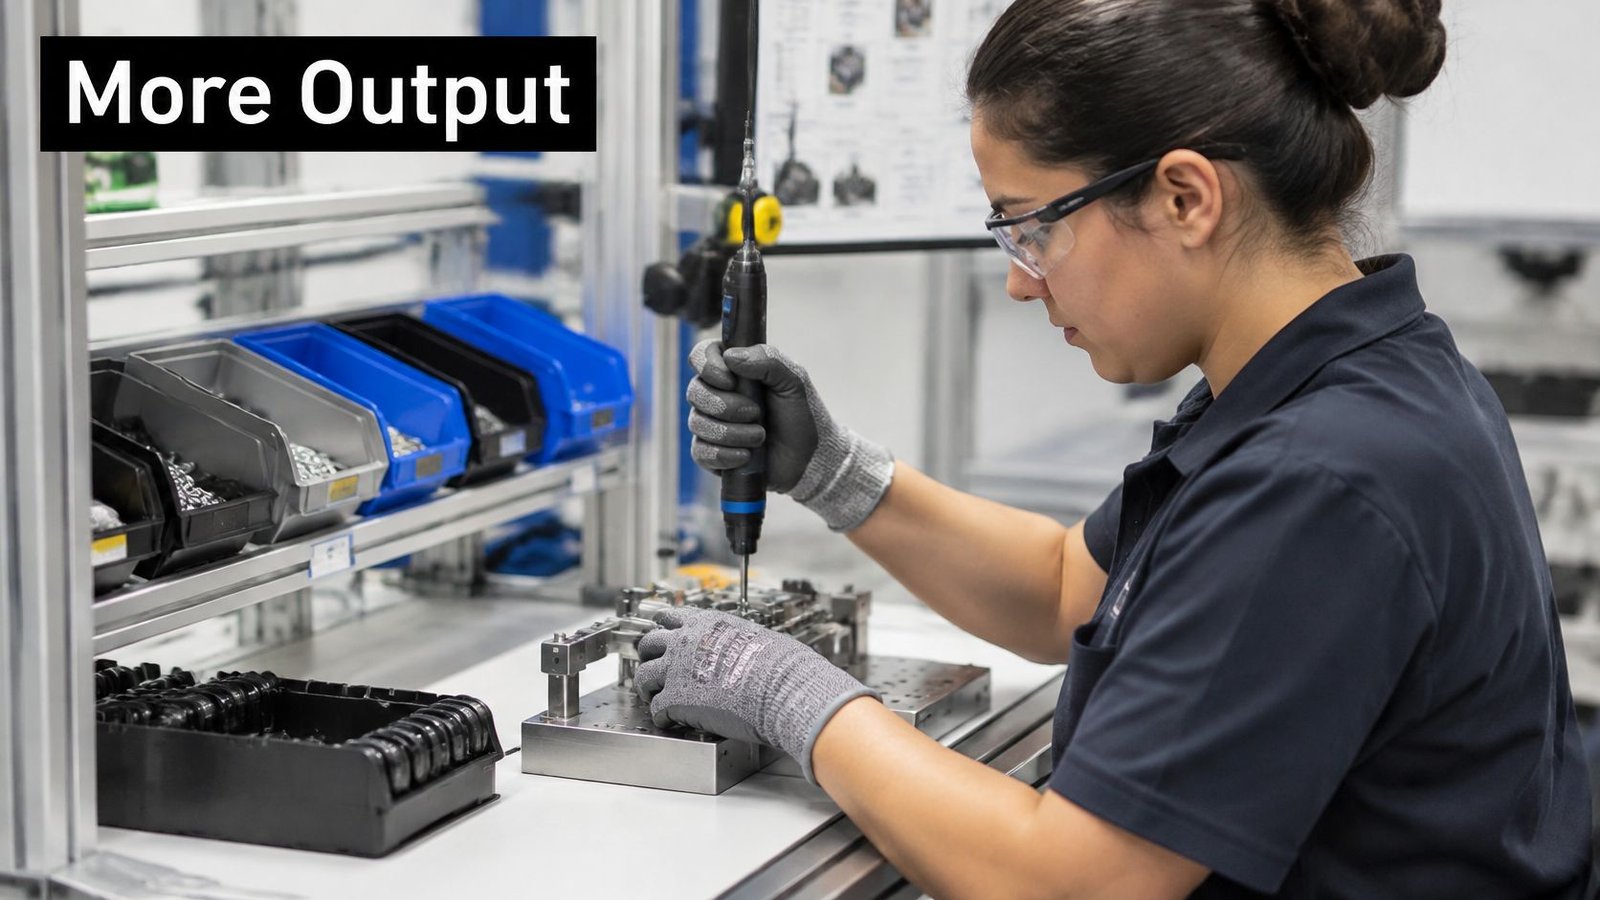
Start with a concrete result. A workstation study indexed in DOAJ reported that a separate redesign reduced fastener-collection time from approximately 75 seconds to 50 seconds, removing about one-third of a non-value-added handling step. The same source notes that in a controlled study of repetitive assembly, an ergonomically optimized workstation reduced average mental workload by approximately 35%, increased productivity by about 5%, reduced working time by roughly 8%, and lowered defect rates by approximately 4 to 5% across sessions.
The mechanism is simple. When components, tools, and fixtures sit inside the operator's optimal working zone, the operator reaches less, searches less, and switches attention less. Standard work becomes repeatable because the bench, not memory, controls the sequence.
Design Moves That Pay Back
Put high-use parts closest, at consistent heights, in trays or feeders that present one part in one orientation. Use poka-yoke fixtures that make wrong orientation physically difficult. Good fixture design and manufacturing turns orientation, clamping, and release into one obvious motion. Add adjustable bench height for different operators, balance tools so they hang at the point of use, and mark reach zones directly on the bench so drift is visible during audits.
Watch how small layout decisions affect motion and sequence in the demonstration below.
Validate every change on more than speed. Track cycle time, first-pass yield, defect rate, and operator workload against the baseline you recorded before the redesign. A station that's faster but produces more rework hasn't lifted the line. It's moved the cost downstream, where it's harder to see and more expensive to fix.
Measuring ROI as Your Line Scales
Payback math fails when teams count gross throughput and call it savings. Use good units, real downtime, and total installed cost, or your payback date is fiction.
The Payback Formula
Divide total installed cost by annual net savings. Installed cost means equipment, tooling, fixtures, controls, installation, commissioning, validation where required, spares, and training. Annual net savings means labor hours released or redeployed, scrap and rework avoided, and margin on extra good units you can sell, minus added maintenance, consumables, and energy.
A semi-automatic pressing and testing station releases operator time, cuts rework, and lets the line ship more good units per shift. Count all three, but count them once. Don't claim the same labor hour as both a saving and extra capacity unless the operator's time is redeployed to productive work.
If yield drops while output rises, you haven't gained capacity. You've gained scrap at a faster rate.
Teams usually miscount in four places. They ignore yield, so started units inflate the benefit. They skip changeover, so flexible equipment looks better than it performs in a mixed schedule. They omit maintenance and unplanned downtime, so theoretical capacity replaces real capacity. They also forget that a faster constraint station only helps until the next station becomes the constraint.
| Metric | How to measure | Why it matters for payback |
|---|---|---|
| Cycle time per unit | Time study at each station, averaged over a full shift | Sets the maximum output of the line |
| First-pass yield | Good units divided by units started, per shift | Shows the cost of rework and scrap |
| Defect rate | Defects per thousand units, by defect type | Tracks quality gains that pay back through fewer returns |
| Changeover time | Minutes from the last good unit of one run to the first good unit of the next | Limits the value of flexible equipment |
| Labor hours per unit | Operator hours booked to the station divided by units | Measures labor released or redeployed |
| Unplanned downtime | Minutes lost to faults per week | Reduces the real capacity of a new system |
Baseline these metrics for a representative production period before installation, then track them the same way afterward. Same definitions, same shift boundaries, same defect categories. Changing the measurement after the purchase makes any result look good.
Scaling Without Rebuilding
Design for the next stage even when you can't fund it yet. Choose modular cells where fixtures and tooling can be reused, leave floor space and utility capacity, air, power, network drops, for an added station, and keep controls architecture consistent so a new cell doesn't need a new programming standard.
Stage the spend. Upgrade one manual station with tooling, measure it for a full production period, then approve the next stage only if it hits its targets for cycle time, yield, and downtime. That discipline protects capital and gives operators time to learn one change at a time. I'd rather see three proven station upgrades than one large line that nobody can prove is working.
GMP and Quality Requirements for Medical Device Lines
On a medical device line, equipment sits inside a documented quality system, and inspectors will treat it that way. Procedures, inspection points, traceability, controlled parameters, and service records all belong in the equipment specification from day one.
Each control below sits where equipment design, documentation, and operator procedure meet.
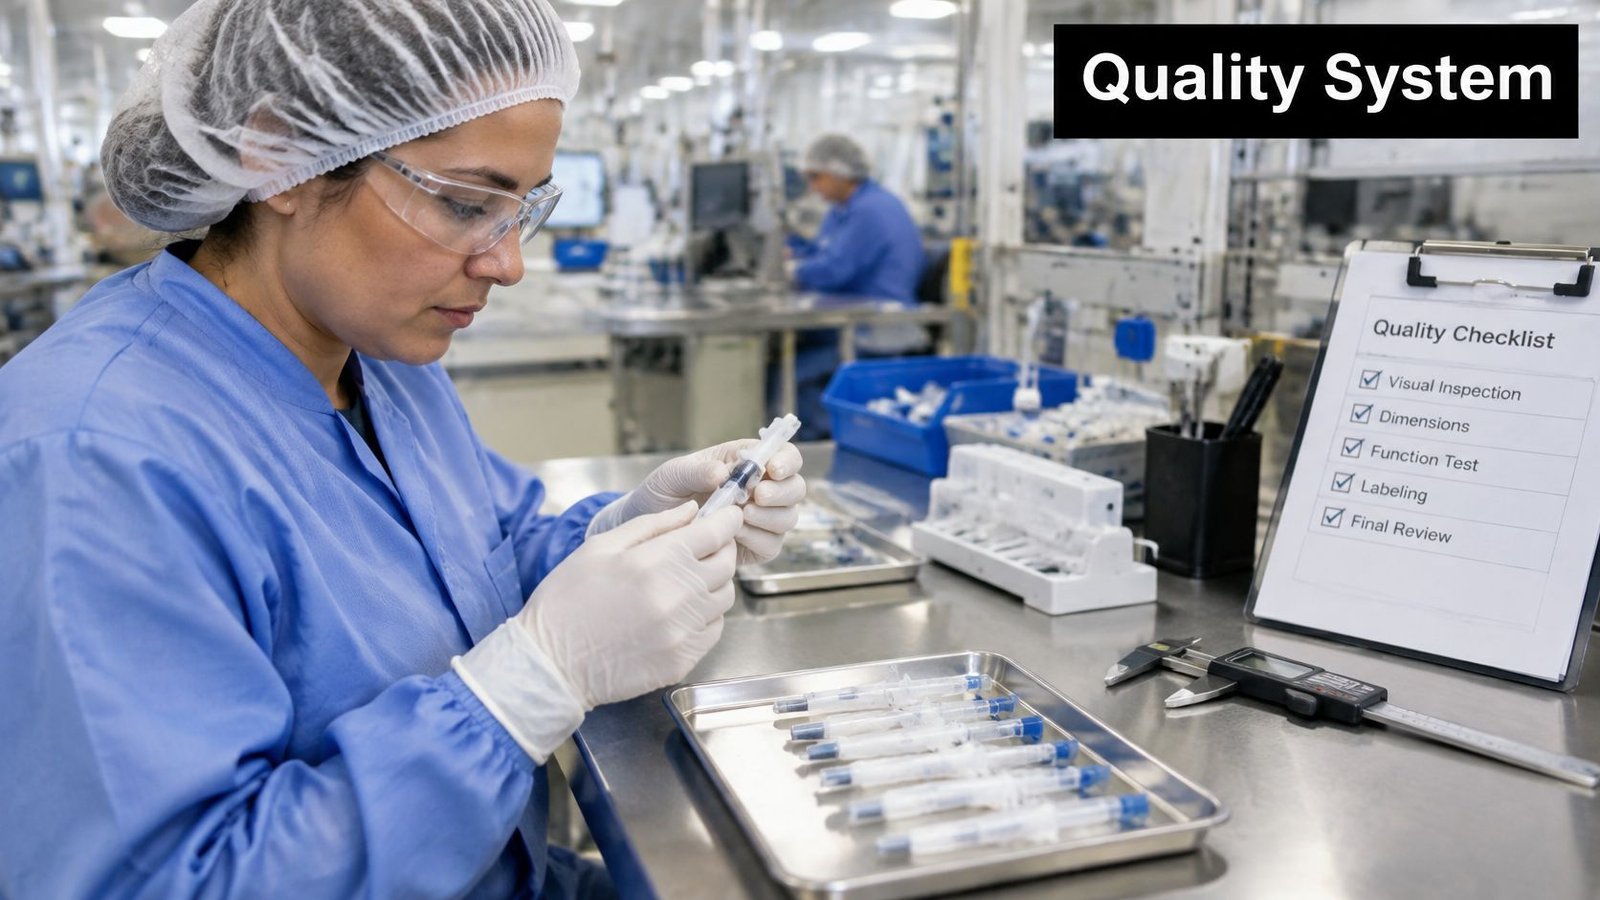
Labeling shows why. A wrong label on a finished device is a traceability and patient safety problem that follows the unit through every distribution record. Understanding what GMP means in manufacturing helps frame why these controls exist before you specify hardware.
Under the quality system regulation, labels must be checked against the device master record before use, labeling operations should be separated as necessary to prevent mix-ups, and labels must remain attached and legible under customary distribution, storage, and use conditions. FDA guidance on quality system regulation labeling requirements maps these duties to 21 CFR 820.80(b) for inspection and testing of incoming materials and 21 CFR 820.120 for labeling controls.
Turning Requirements Into Equipment Features
- Wrong-label prevention: Fixtures that accept only the correct label format, plus barcode or vision checks that compare the label to the active work order before application.
- Mix-up prevention: Physical separation of labeling operations, controlled access to label stock, and line clearance between runs so no prior labels remain at the station.
- Suspect-unit control: Reject handling that routes failed units into a locked or clearly marked path, off the line and away from operator judgment.
- Evidence capture: Cycle counts, inspection results, and parameter records tied to lot or device history, captured by controls during the run so nothing is reconstructed afterward.
Which of these earns automation budget comes down to your time study. If operators spend measurable seconds per cycle hand-entering lot codes or visually confirming label placement, a vision check or controls-captured record pays back fast. If labeling errors barely appear in the defect log, a keyed fixture and a line-clearance procedure may satisfy the requirement at a fraction of the cost.
Any equipment or parameter change goes through formal change control, with validation evidence proportionate to risk. That includes a fixture modification that seems purely mechanical. If it can affect identity, quality, or traceability, it is a controlled change.
Non-medical lines can borrow this logic profitably. Barcode verification, reject segregation, and line clearance reduce defects anywhere. But don't claim GMP compliance where the device rules don't apply, and don't buy validation burden you don't need.
Before you select a supplier for regulated work, ask three questions. What qualification documentation do you provide with the equipment? How do your controls capture and retain inspection evidence? How do you support change control when we modify tooling or parameters after installation? Vague answers now become audit findings later.
Decide Whether You Need an Engineering Partner
You don't need outside engineering for every improvement. Rebalancing tasks, moving parts closer, and marking reach zones are internal work. Bring in a partner when the fix requires design and build capability you don't have on staff, or when a mistake would disrupt production you can't afford to stop.
Three Conditions That Justify Help
First, the bottleneck is clear but the solution needs custom tooling or a fixture designed around a specific part, force, or tolerance. That's design work, not catalog purchasing. We design tooling to upgrade a manual system to a semi-automatic one as production demands increase, without a complete overhaul, which keeps your proven stations in place.
Second, new equipment must connect to existing machines, controls, or conveyors without disrupting the production environment. We design automation systems that integrate with existing equipment and enhance, not disrupt, that environment, so integration risk is planned rather than discovered during installation week.
Third, the work is medical device production and needs GMP-aware documentation, commissioning discipline, and traceability logic built into the equipment from concept stage. Retrofitting compliance costs more than designing for it.
Decision test: If your time study names one clear constraint and your goal is defined, you're ready for a concept review. If the constraint is still a guess, finish the baseline study first.
What to Gather Before the First Conversation
Bring station-level cycle times, shift volumes and expected growth, defect and rework data by type, labor constraints, floor space and utilities, and your budget range and timeline. In our no-obligation manufacturing automation consultation, we aim to understand your current challenges and bottlenecks, labor and production constraints, quality or consistency concerns, and budget and timeline expectations. That conversation moves faster when your numbers are already on the table.
With over 30 years of hands-on experience in manufacturing and inline automation, we can tell you plainly when a fixture solves it, when a semi-automatic cell earns its cost, and when you should keep the manual station and spend the money elsewhere. Sometimes the right answer is a smaller project than you expected.
If your time study points to one constraint station and you need custom tooling, a fixture, or a semi-automatic cell that fits your existing line and budget, talk with System Engineering & Automation. Bring your cycle times, volumes, and quality concerns, and we'll help you choose the automation level that pays back on measured results, not on a sales promise.