You're probably dealing with a line that looks acceptable on paper but behaves differently every shift. One operator builds good parts all morning. Another operator runs the same station after lunch and rejects start climbing. Cycle time drifts. Final inspection starts catching variation that should never have escaped the cell. People often blame training first. In many plants, the issue is simpler. The process has no stable mechanical reference.
That's where fixture design and manufacturing changes the conversation. A good fixture doesn't just hold a part. It defines where the part sits, how it's supported, how it's clamped, and what the operator can and cannot do wrong. For manufacturers trying to optimize production and services, that matters directly to cost, throughput, quality, and audit readiness.
The value is bigger in semi-automated systems. Manual work still exists, but the fixture carries more of the precision burden. That reduces variation without forcing a full robotics project. For SMEs and regulated manufacturers, that's often the most practical path to better ROI.
Table of Contents
- From Inconsistency to Precision How Fixtures Drive Profit
- Understanding Manufacturing Fixtures The Foundation of Quality
- The Blueprint for Success Core Principles of Fixture Design
- Choosing Your Materials and Manufacturing Methods
- Integrating Fixtures into Semi-Automated Systems
- GMP Validation and Maintenance for Critical Applications
- Maximizing ROI with Strategic Fixture Solutions
From Inconsistency to Precision How Fixtures Drive Profit
A common floor problem looks like this. Parts arrive from machining within print. Assembly still struggles. Operators nudge components into place, add extra hand pressure during fastening, and compensate in slightly different ways. The output is inconsistent, even when the incoming parts are acceptable.
That isn't a labor problem first. It's a process control problem.
In medical device assembly, fixtures are custom-designed tools that perform stabilizing or positioning tasks to ensure rapid, accurate, and repeatable assembly of components, which directly supports product uniformity, reliability, and compliance, as described by in-house fixture engineering for medical device assembly. The same logic applies outside regulated sectors. If the workpiece isn't controlled, the process isn't controlled.
What poor fixturing costs in practice
When a station depends on operator feel, three things usually happen:
- Variation creeps in: One person seats the part fully. Another leaves a slight gap.
- Cycle time spreads: The station runs fast when alignment is easy and slows down when it isn't.
- Inspection becomes a filter: Quality checks catch instability after value has already been added.
Those losses don't always show up as one dramatic event. They show up as repeated delays, rework loops, and stop-start production.
Practical rule: If an operator has to “find” the correct position every cycle, the fixture hasn't done its job.
Why custom fixtures improve margins
A properly designed fixture creates a repeatable mechanical baseline. The part lands in the same place. The support points are controlled. The clamp applies force where it should. The next process sees a stable input instead of a variable one.
That stability matters because the global manufacturing market reached $8.6 trillion in value added in 2024, equal to 17.5% of global GDP, according to manufacturing industry statistics compiled by Fictiv. At that scale, manufacturers don't stay competitive by accepting avoidable process variation. They stay competitive by building repeatability into each workstation.
For SMEs upgrading manual lines, fixtures are often the fastest route to measurable improvement. You don't need a fully automated cell to gain control. You need a station that removes guesswork. Once the fixture stabilizes the work, automation becomes easier, quality improves, and labor is used for value-added actions instead of correction.
Understanding Manufacturing Fixtures The Foundation of Quality
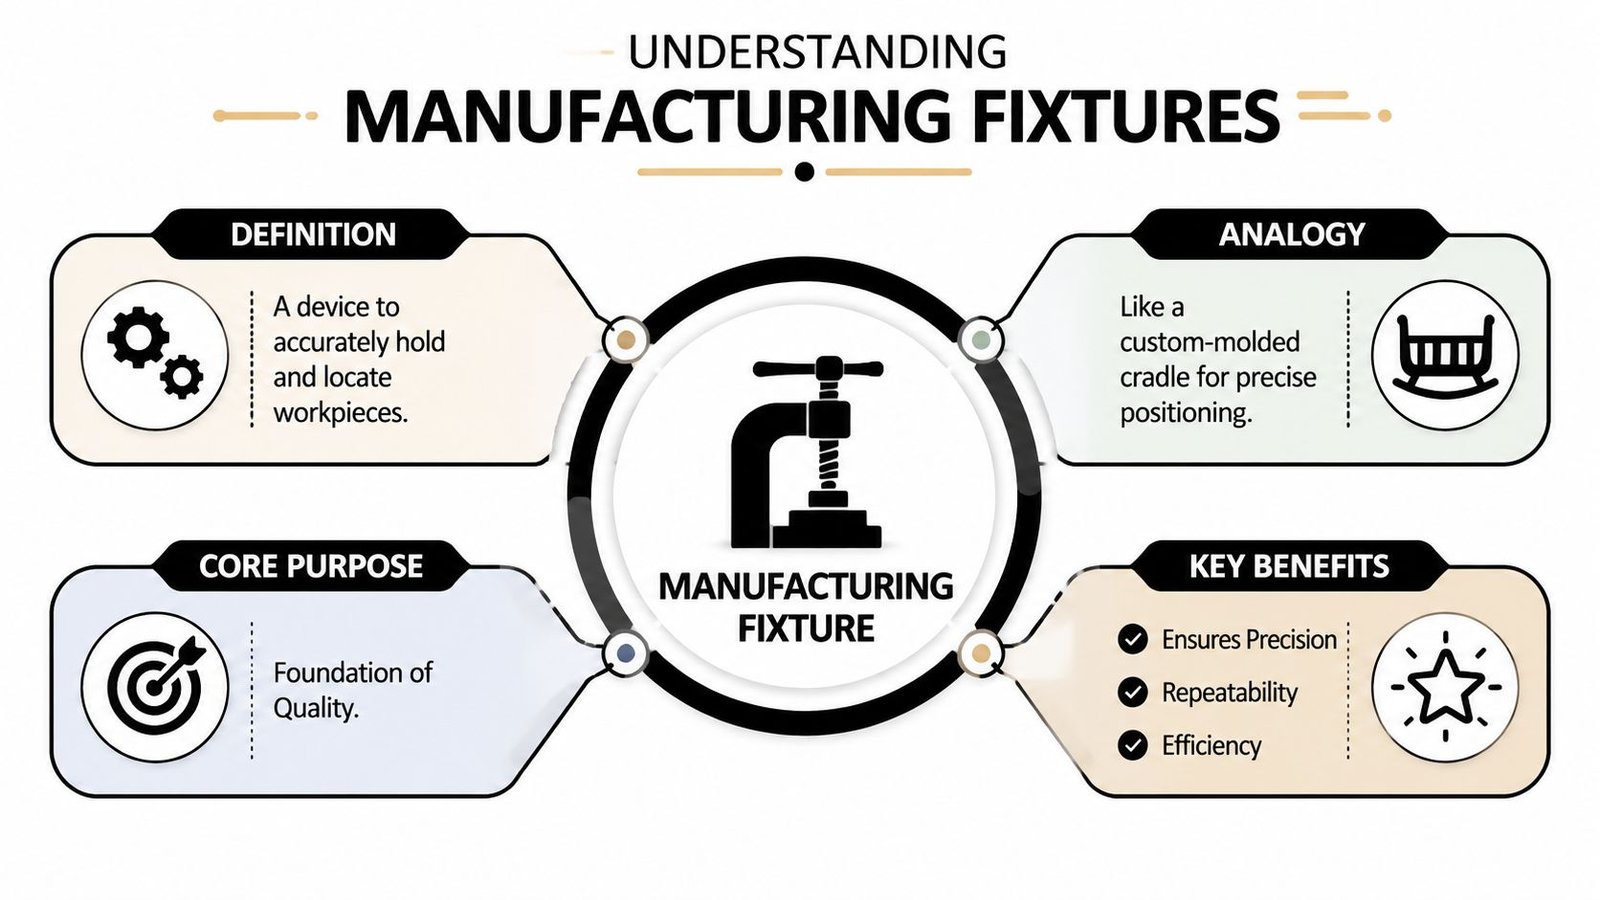
A manufacturing fixture is a purpose-built device that holds, locates, and supports a workpiece so production can happen the same way every cycle. The easiest analogy is a custom-molded cradle for a fragile product. If the cradle matches the shape and critical surfaces correctly, the item sits where it should without constant adjustment. A fixture does the same job for metal parts, plastic components, subassemblies, and test articles.
The three jobs every fixture must do
A fixture only earns its place on the floor if it handles three functions well.
- Locate the part: The fixture establishes the exact position and orientation of the workpiece.
- Support the part: It prevents sag, rocking, deflection, or movement during the operation.
- Clamp the part: It keeps the part stable under process forces without damaging or distorting it.
If one of those functions is weak, the whole station becomes unreliable. A clamp without proper locating just locks in inconsistency. A good nest without proper support can still let the part flex.
Fixtures and jigs increase productivity, improve the repeatability of part features, and simplify part assembly and disassembly. Nearly all automated industrial manufacturing processes rely on these tools to consistently build parts that function correctly, as noted in Fusion Design's fixture and jig design guidance.
Fixture versus jig
People still mix these up on the shop floor. The distinction matters.
A fixture holds and positions the workpiece.
A jig holds the workpiece and guides the tool.
That means a machining nest with clamps is a fixture. A drill plate with hardened guide bushings is a jig. In CNC and semi-automated systems, fixtures appear more often because the machine, program, actuator, or controlled process already defines the tool path. The fixture's job is to make sure the part is always in the right place for that controlled action.
A strong fixture reduces dependence on operator skill. A weak fixture turns skilled operators into compensators.
Why managers should care about the definition
This isn't a terminology exercise. It affects purchasing, line design, and troubleshooting.
When a team understands fixtures clearly, they stop asking, “How do we get operators to be more careful?” and start asking better questions:
- Where is the true datum?
- What motion is still possible after loading?
- Is clamping adding distortion?
- Can the operator load the part incorrectly?
Those questions lead to better fixture design and manufacturing decisions. They also lead to better business outcomes, because repeatability at the station level drives quality across the full line.
The Blueprint for Success Core Principles of Fixture Design
A fixture earns its keep when it removes variation at the station, shortens cycle time, and makes defects harder to create. In semi-automated lines, that has a direct effect on margin. Better repeatability cuts rework, operator intervention, and validation headaches.
What stable location actually means
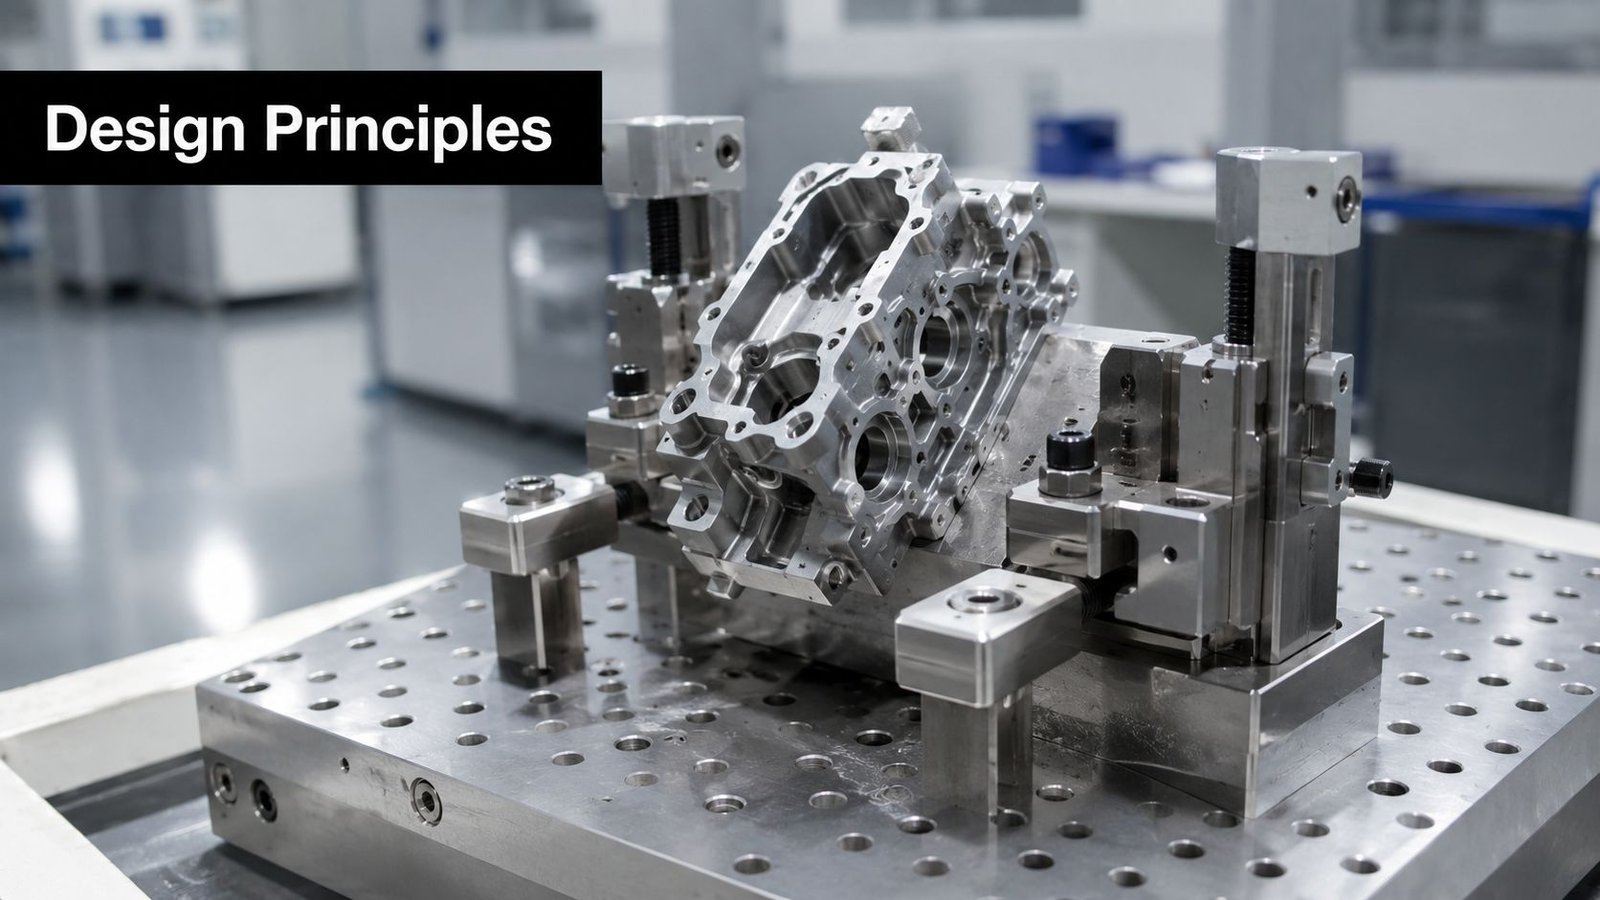
The starting point is controlled location. If the part can settle differently from one cycle to the next, the process will drift even if the machine, cylinder, or sensor performs exactly as specified.
The 3-2-1 locating principle remains the standard method because it constrains all six degrees of freedom with a simple, inspectable layout. Three points establish the primary plane, two control the secondary plane, and one fixes the tertiary plane, as explained in Carr Lane's guide to the 3-2-1 principle.
In practice, the logic is straightforward:
- Three points create a stable base plane.
- Two points stop lateral movement on the next plane.
- One point fixes the remaining orientation.
That sounds basic. On the shop floor, it decides whether the fixture repeats or compensates.
For parts with tight fits, cosmetic requirements, or multiple downstream assembly references, locator layout must also match the actual datum scheme of the product. A fixture can repeat perfectly to the wrong surfaces and still create scrap. That is why fixture design should be reviewed together with tolerance stack-up analysis across the full assembly process, especially in SME environments where one station often has to absorb variation from upstream manual work.
Clamping, rigidity, and mistake-proof loading
Location alone does not protect yield. The fixture also has to hold the part through the actual process without distortion, chatter, or operator workarounds.
Three points usually separate production-ready fixtures from fixtures that only look good in CAD:
- Controlled clamping: Clamp force must seat the part against the locators without bending thin sections, damaging finished surfaces, or shifting the datum.
- Structural stiffness: The base, risers, pins, and clamp arms must resist process loads and repeated cycling.
- Mistake-proof loading: The operator should get one obvious loading method, with clear confirmation that the part is fully seated.
Clamping direction matters more than many teams admit. If the clamp force pushes across the locator instead of into it, repeatability drops. If the clamp pad lands on a flexible rib or unsupported wall, the fixture creates its own tolerance problem.
For semi-automated cells, pneumatic or toggle-assisted clamping often improves the business case because it reduces manual effort and gives more consistent clamp force. That matters in GMP-sensitive production too. Consistent clamping is easier to validate than operator-dependent tightening, and it usually reduces fatigue on stations with high daily cycles.
Design for the real operator and the real audit
A fixture that works for engineering review can still fail on the line.
Operators need clear hand access, safe loading posture, and visual confirmation of correct seating. If the fixture forces wrist twist, blind loading, or awkward two-hand placement near moving actuators, cycle time rises and error rates follow. For SMEs running semi-automated systems, ergonomics is not a nice extra. It affects staffing flexibility, training time, and daily output.
In regulated production, cleanability and traceability also shape the design. Sharp internal corners, exposed threads in dirty zones, trapped product residue, and hard-to-replace wear pads all increase maintenance time and complicate GMP documentation. A fixture for medical, food, or personal care assembly needs surfaces, joints, and components that can be cleaned, inspected, and serviced without guesswork.
A short checklist that works on real stations
Before release, check these points:
- Datum logic first: Do the locators reference functional geometry that matters to the process or assembly?
- Clamp direction second: Does the clamp drive the part into the locators and not across them?
- Operator access: Can the part be loaded, verified, and unloaded without awkward reach or blocked sightlines?
- Misload prevention: Can the part be reversed, tilted, or half-seated and still start the cycle?
- Maintenance access: Can pins, pads, sensors, and clamps be replaced quickly without stripping the full fixture?
- Compliance fit: Can the fixture be cleaned, inspected, and documented in a way that supports GMP requirements if the application demands it?
One practical rule has held up across machining, assembly, and inspection cells. The fixture should remove choices from the cycle. Every extra choice left to the operator adds variation, and variation always shows up later as scrap, rework, downtime, or audit findings.
Simulation helps, but only when it answers a production question. Use FEA to check clamp-induced deflection and structural movement. Use clearance studies to confirm hand access, tooling access, and sensor placement before metal is cut. That upfront work costs far less than rebuilding a fixture after SAT or after the first month of production exposes the weak points.
Choosing Your Materials and Manufacturing Methods
A fixture that holds tolerance for six months and one that starts drifting after six weeks can look almost identical in CAD. The difference is usually material choice and build method. That decision hits three lines on the P&L at once. Upfront capital, maintenance cost, and yield.
Material should match cycle count, process load, cleaning method, and the cost of a stop. A low-volume assembly nest for a manual or semi-automated production cell does not need the same construction as a welding fixture running all day beside heat, spatter, and repeated clamp loads. Overbuilding ties up budget with no payback. Underbuilding shows up later as rework, shimming, worn locators, and line interruptions.
Material choice changes the business case
Tool steel earns its cost where contact points wear fast and position repeatability drives product quality. Locator pins, drill bushings, clamp pads, and wear strips are common examples. Hardness and wear resistance keep those surfaces stable, which reduces adjustment work and protects Cpk over longer runs. AZoM's overview of D2 tool steel is a useful reference for why this grade is widely used in wear-heavy tooling.
Mild steel still makes sense for many base frames and welded structures. It is easier to cut, weld, and modify on the shop floor, which matters during debug and ECN changes. That flexibility has real value for SMEs because early fixture revisions are common, especially when the product design is still settling.
Stainless steel belongs in fixtures that must handle aggressive cleaning, humidity, or product-contact risk. In GMP-sensitive applications, cleanability is not a side issue. Surface finish, corrosion resistance, and resistance to trapped contamination affect validation effort, inspection time, and how confidently the fixture can stay in service.
Aluminum solves a different problem. It reduces fixture weight, improves operator handling, and shortens setup effort for changeovers or portable nests. The trade-off is lower wear resistance and more movement under heat and clamp load. For light-duty assembly or inspection, that can be a good trade. For precision welding or high-contact stations, it often is not.
Fixture Material and Method Comparison
| Material/Method | Best For | Cost | Durability | Lead Time |
|---|---|---|---|---|
| Tool steel, CNC-machined | High-wear, high-precision, long-running production fixtures | Higher upfront cost | Very high | Longer |
| Mild steel, fabricated and machined | Welded structures, general production fixtures, cost-sensitive builds | Moderate | Good | Moderate |
| Stainless steel, machined or fabricated | GMP-aware environments, washdown areas, corrosive applications | Higher | High | Moderate to longer |
| Aluminum, CNC-machined | Lighter fixtures, moderate loads, faster handling | Moderate | Moderate | Moderate |
| 3D-printed polymer fixture | Prototype fixtures, low-load nests, fast concept validation | Lower upfront cost | Lower | Fast |
| Hybrid printed and machined fixture | Complex geometry with selected hard-wear surfaces | Moderate | Application-dependent | Fast to moderate |
Manufacturing method affects fixture performance
Build method is not only a sourcing decision. It changes stiffness, tolerance control, serviceability, and how easily the fixture can be repaired.
Fully machined fixtures cost more, but they give tighter control over datum relationships and flatness. Fabricated steel frames are cheaper for larger structures, though they need a smart machining plan after welding to recover critical geometry. If that post-weld machining step is skipped or minimized too aggressively, the savings disappear in alignment work and recurring quality issues.
Welding fixtures need especially careful thinking around thermal behavior. Aluminum workpieces expand faster and spread heat differently than carbon steel, so rigid clamping can pull the part out of tolerance during the cycle. The Fabricator's guidance on designing welding fixtures supports the usual shop-floor approach. Allow controlled compliance where the part needs to move, and keep the true datums stable. Carbon steel parts generally allow more rigid restraint, but access for torch angle, spatter protection, and quick replacement of sacrificial elements still matter.
Where additive fixtures help and where they don't
Additive tooling works well for prototype nests, sensor mounts, low-force handling aids, and quick checks before committing to machined metal. It cuts lead time and helps teams prove loading logic early. That can save weeks on development schedules.
Its limits show up in wear, heat, chemical exposure, and long-term dimensional stability. Cadimensions' resource on additive manufacturing for fixtures and tooling explains the design freedom well, but the commercial decision still comes down to cycle life and risk. Printed fixtures are often right for bridge production and low-load tasks. They are rarely the best answer for contact points that must hold size after thousands of cycles.
A practical selection path works like this:
- Use printed fixtures for concept validation, poka-yoke trials, and low-force applications where speed matters more than wear life.
- Use machined aluminum for lighter nests and fixtures that operators lift or swap often.
- Use fabricated steel with machined datums for larger, cost-sensitive fixtures that still need good repeatability.
- Use tool steel inserts or wear components where local durability matters more than building the whole fixture from hardened stock.
- Use stainless steel where cleaning, corrosion resistance, and audit readiness affect the true cost of ownership.
For regulated production, the cheapest fixture to build is often not the cheapest fixture to own. If the tool has to be cleaned repeatedly, inspected, maintained, and requalified without doubt, material and process choices should support that from day one. That is how fixture design stops being a tooling expense and starts acting like a margin decision.
Integrating Fixtures into Semi-Automated Systems
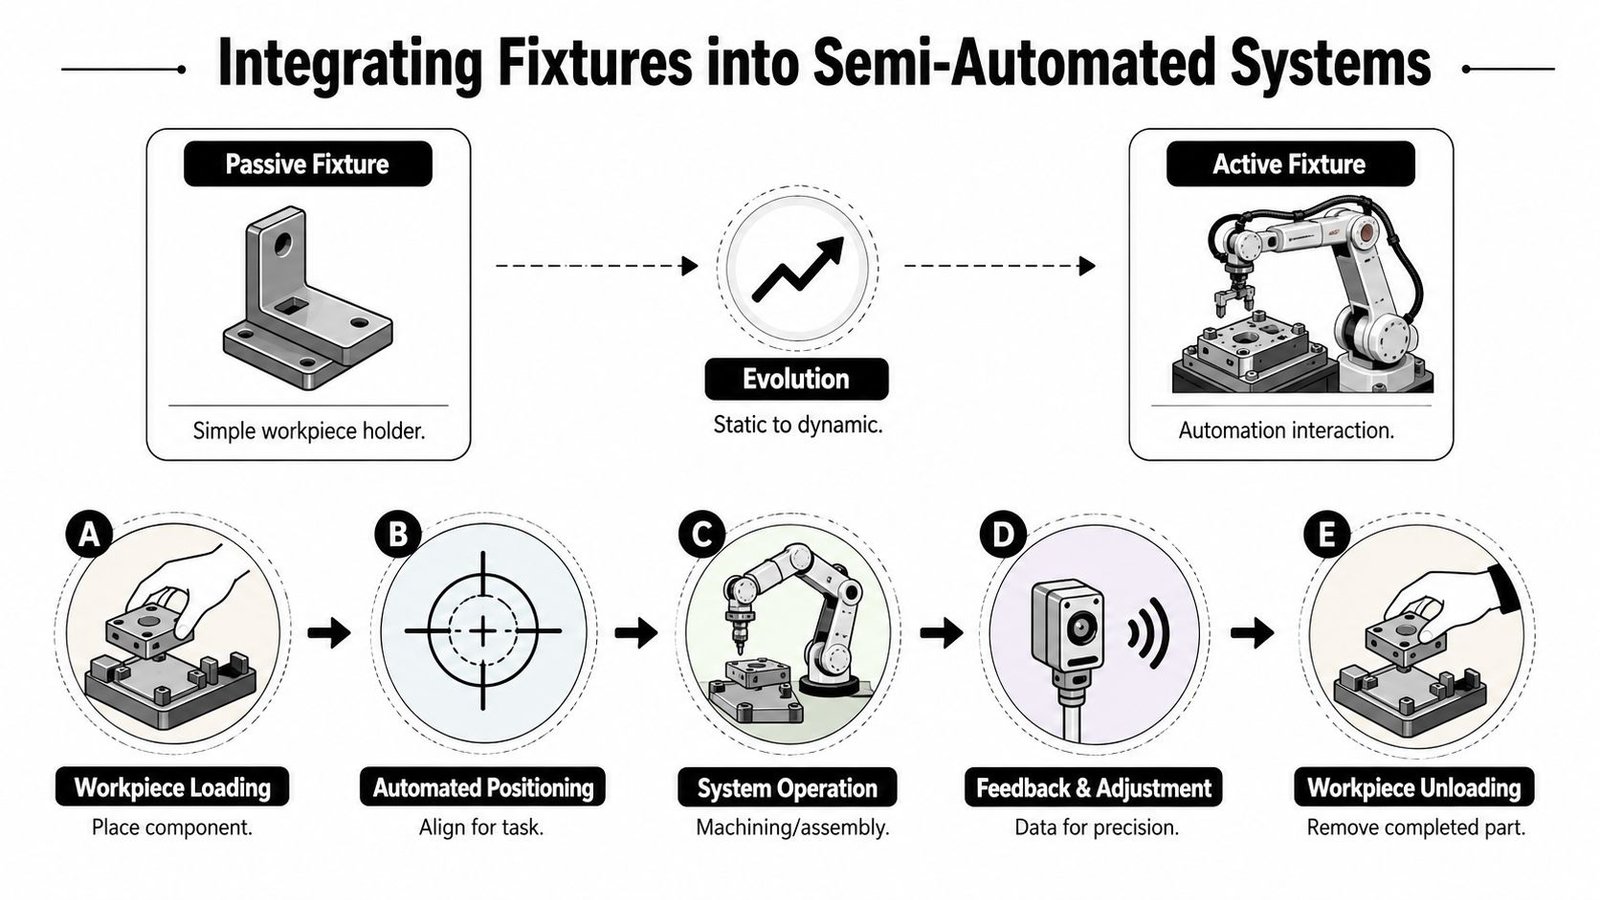
A basic fixture holds a part. A productive semi-automated fixture also interacts with the process. It can confirm part presence, trigger a sequence, lock out an incorrect cycle, or support one-handed loading while the system handles clamping and verification.
From passive holder to active process element
The shift from passive to active fixturing is where many manufacturers find the best ROI. They don't need a fully robotic line. They need a station that makes the right action easy and the wrong action difficult.
A smart fixture often adds:
- Pneumatic or one-touch clamping for faster, more consistent securing
- Part-present sensors to confirm the component is seated
- Position confirmation before pressing, fastening, welding, or testing
- Simple control logic so the cycle won't start if conditions aren't met
- Hands-free or one-handed operation to improve ergonomics and handling
To eliminate human variability, which is the biggest source of inconsistency in production, test and assembly fixtures should be designed so that a machine or tool performs the holding and locating job rather than a human operator, ensuring the device can only be placed in a single position and single orientation, as explained in medical device test fixture design for maximum repeatability.
That principle applies well beyond testing. In a semi-automated line, the fixture becomes the control point between human motion and machine action.
A good example of this approach is the use of semi-automated systems that fit budget and production goals, where targeted automation supports the operator instead of replacing the entire workstation.
What smart fixtures do on the shop floor
The gains aren't only about speed. They're about cleaner process discipline.
If the fixture knows the part is missing, reversed, or not fully seated, the station can stop the mistake before value is added.
That one change improves quality, but it also improves labor efficiency. Operators spend less time correcting alignment, wrestling clamps, and second-guessing whether the setup is ready.
A useful visual example of fixture-assisted automation is below.
There's also a strong ergonomics case for semi-automated fixture design. Existing resources often mention one-handed operation and error-obvious geometry, but rarely translate ergonomics into fixture KPIs. One cited industry analysis notes that 40% of workplace injuries in manufacturing stem from repetitive motion and poor tool design, highlighted in the SME study guide referenced in the ergonomics discussion. For operations teams, that means fixture design shouldn't only chase throughput. It should reduce awkward reach, repeated force, and preventable handling strain.
GMP Validation and Maintenance for Critical Applications
A fixture used in regulated production has to hold its process capability after handover, not only pass a buyoff at FAT. In medical device, pharma support operations, and other controlled environments, the fixture becomes part of the quality system because it affects alignment, applied force, traceability, cleaning, and release confidence.
That changes the design brief. The fixture must be easy to verify, easy to clean, and easy to maintain without disturbing its critical datums.
Validation has to prove repeatability in real production
Qualification still follows the familiar path:
- IQ: Confirm the fixture was built, installed, and documented to the approved design.
- OQ: Confirm it operates across the defined process window, including acceptable part variation and operator use.
- PQ: Confirm it delivers consistent output during normal production with trained operators, approved materials, and standard work.
On paper, that looks straightforward. On the floor, the consequences of weak fixture decisions become evident. A clamp that shifts slightly after repeated cycles, a hard-to-clean pocket that traps residue, or a locator that wears faster than expected can all pass early checks and still create deviation risk later.
For tight-tolerance welding and assembly fixtures, validation should include dimensional confirmation of the critical locating features before release. That typically means checking datums, pin locations, nest geometry, and clamp positions against the drawing using calibrated inspection equipment such as a CMM when the tolerance stack leaves little room for adjustment. For a useful reference on how metrology supports fixture accuracy in production, Mitutoyo outlines the role of coordinate measuring machines in dimensional inspection and process control.
Cleanability matters just as much. If operators cannot access contact surfaces, or if the fixture includes threads, gaps, and horizontal ledges that collect debris, validation becomes harder to sustain. Teams working under regulated quality systems should align fixture decisions with broader GMP manufacturing requirements and quality expectations.
A practical maintenance routine
Maintenance should protect the original process intent. It should also be simple enough that production teams will follow it.
Use a short recurring checklist:
- Inspect locators: Check pins, pads, nests, and datum faces for wear, burrs, looseness, or damage from part loading.
- Verify clamp function: Confirm full travel, consistent holding force, and no part marking.
- Recheck alignment: Verify critical relationships after repair work, accidental impact, or unexplained quality drift.
- Tighten and replace hardware: Loose fasteners, worn bushings, and tired springs create slow, expensive variation.
- Clean to the approved standard: Use cleaning methods that match the fixture material, process residue, and GMP expectations.
- Record every intervention: Note what changed, who approved it, and whether requalification is required.
A fixture rarely fails all at once.
More often, it drifts. Output stays acceptable for a while, then reject rates climb, cycle time stretches, and operators start compensating by feel. That is expensive for SMEs because the loss hides inside labor hours, rework, and delayed investigations. A disciplined maintenance plan protects the return on the fixture by keeping the process stable long after commissioning.
Maximizing ROI with Strategic Fixture Solutions
The business case for fixture design and manufacturing is straightforward. A stable process wastes less time, creates fewer defects, and needs less operator compensation. That turns fixturing from a tooling expense into a production strategy.
The market confirms how central these tools are. The global special die and tool, die set, jig and fixture market reached nearly $55.6 billion in 2023 and is projected to reach $77.3 billion by 2028, according to market data on jig and fixture growth through 2028. Manufacturers don't keep investing in fixtures at that scale unless the return is real.
Where the return usually shows up
A strong fixture solution pays back through multiple channels at once:
- Less scrap and rework: Better location and support reduce variation before defects happen.
- More consistent cycle time: Operators stop spending effort on alignment and correction.
- Lower labor intensity per unit: The fixture carries precision so labor can focus on value-added tasks.
- Better quality output: Stable positioning supports repeatable assembly, inspection, welding, or machining.
- Safer workstations: Better ergonomics reduce awkward handling and repetitive stress exposure.
For SMEs, this matters because the best next step usually isn't maximum automation. It's the right amount of control. A well-designed semi-automated fixture often delivers a better ROI than an oversized capital project because it solves the actual bottleneck instead of introducing unnecessary complexity.
What works and what doesn't
What works:
- Build fixtures around real datums and real operator behavior.
- Match materials to wear, environment, and validation needs.
- Add sensors, clamping assistance, and logic only where they remove meaningful risk.
- Maintain the fixture as part of the process, not as an afterthought.
What doesn't work:
- Designing only for CAD, not for service and loading
- Using a low-cost material where thermal or wear stability is critical
- Assuming operators will compensate forever
- Treating GMP validation as paperwork instead of process proof
A good fixture doesn't just hold a part. It protects margin, supports quality, and makes production easier to scale.
If your team is upgrading a manual station, validating a GMP-aware process, or looking for a cost-effective way to optimize production and services, System Engineering & Automation builds practical fixture, tooling, and semi-automated solutions around the way your line runs. The focus stays on repeatability, serviceability, and ROI so you get equipment that improves quality and throughput without overspending on automation you don't need.