
About 2.93 million workers died from work-related causes in 2019, according to the International Labour Organization issue paper, and roughly 89% of those deaths resulted from occupational diseases rather than accidents. That split changes how you should run a hazard identification process on a production line. If your review only looks for the pinch point that hurts someone today, you'll miss the dust, chemical exposure, noise, ergonomic strain and long hours that hurt people slowly.
For semi-automated cells, there's a second trap. The normal cycle usually looks controlled, while exposure peaks during jam clearing, changeover, cleaning, setup, troubleshooting and manual fallback. Treat hazard identification as a life-cycle review of every task and mode, not a checklist completed right before commissioning, and you'll find the hazards that drive injuries, quality holds and unplanned downtime.
Table of Contents
- Choose a Hazard Method That Fits the Line
- Run the Hazard Identification Process in Order
- Score Each Hazard on a Shared Matrix
- Convert Hazards into Controls That Stay in Place
- Tips for Automation Changes and Abnormal Modes
- Reopen the Register Before the Next Change
Choose a Hazard Method That Fits the Line
A hazard review that starts after tooling and staffing are fixed has fewer options for eliminating exposure. The OSHA 2024 work-related injury and illness summary reported data from 392,735 establishments, about 57% of which recorded at least one work-related injury or illness, with 1,478,310 cases in total. Those establishments also reported more than 18 million days away from work and more than 22 million days of job restriction or transfer. Use the figures as context for why hazard review belongs early in planning, before design choices become difficult to change.
Start by separating three terms: the hazard is the source of potential harm, the hazardous situation is the person's exposure to it, and the hazardous event is what could trigger harm. On a rotating dial, the dial is the hazard source, an operator's hand entering its zone during a jam is the situation, and unexpected indexing is the event. Keep these distinctions clear before scoring risk, or the discussion can collapse into debating numbers while missing exposure scenarios.
Which Hazard Method to Run
| Method | Use it when | Typical team | Main output | Blind spot |
|---|---|---|---|---|
| Checklist | Known tasks, GMP benches, audits, installation | 2-4, including an operator | Gap list against known hazards | Novel faults and abnormal modes |
| FMEA | Semi-automatic cell with parts, sensors, and failure modes | 4-7 cross-functional | Failure mode, severity, occurrence, detection | Process deviations and improvised tasks |
| HAZOP | Batch or continuous process suited to guide words | 5-8, with the process owner | Deviations from design intent | Too heavy for one fixture or bench |
| PHA | Concept, layout, or automation level still open | 4-6 | Scenarios before drawings freeze | Less component detail than FMEA |
Match the method to the work. A checklist suits established tasks, such as a GMP bench review or repeat audit, but it will not reliably expose novel faults or workarounds. FMEA fits a semi-automatic cell with discrete parts, sensors and identifiable failure modes. Build its worksheet from the process description and prior failure records before the session, using this failure mode analysis for production equipment as a reference for the method. During the review, examine not only normal operation but also jam clearing, changeover, manual fallback and software changes. FMEA can organize component and failure-mode analysis, while improvised tasks and process deviations still need direct attention. HAZOP works when guide words such as no, more, less, reverse and other than suit a batch or continuous process. Use PHA while concept, layout or automation level can still change without scrapping drawings.
For a typical small or mid-sized line, run PHA at concept, FMEA on the workstation, and a checklist at installation and changeover.
Lock the Method Before Invitations Go Out
Whatever method you choose, ISO 12100 requires defining machine limits, intended use, reasonably foreseeable misuse, people exposed and life-cycle phases. A checklist or FMEA does not replace that definition. Set the method, scope and required attendees before scheduling the workshop, so the review stays focused and covers the work modes that create exposure.
Run the Hazard Identification Process in Order
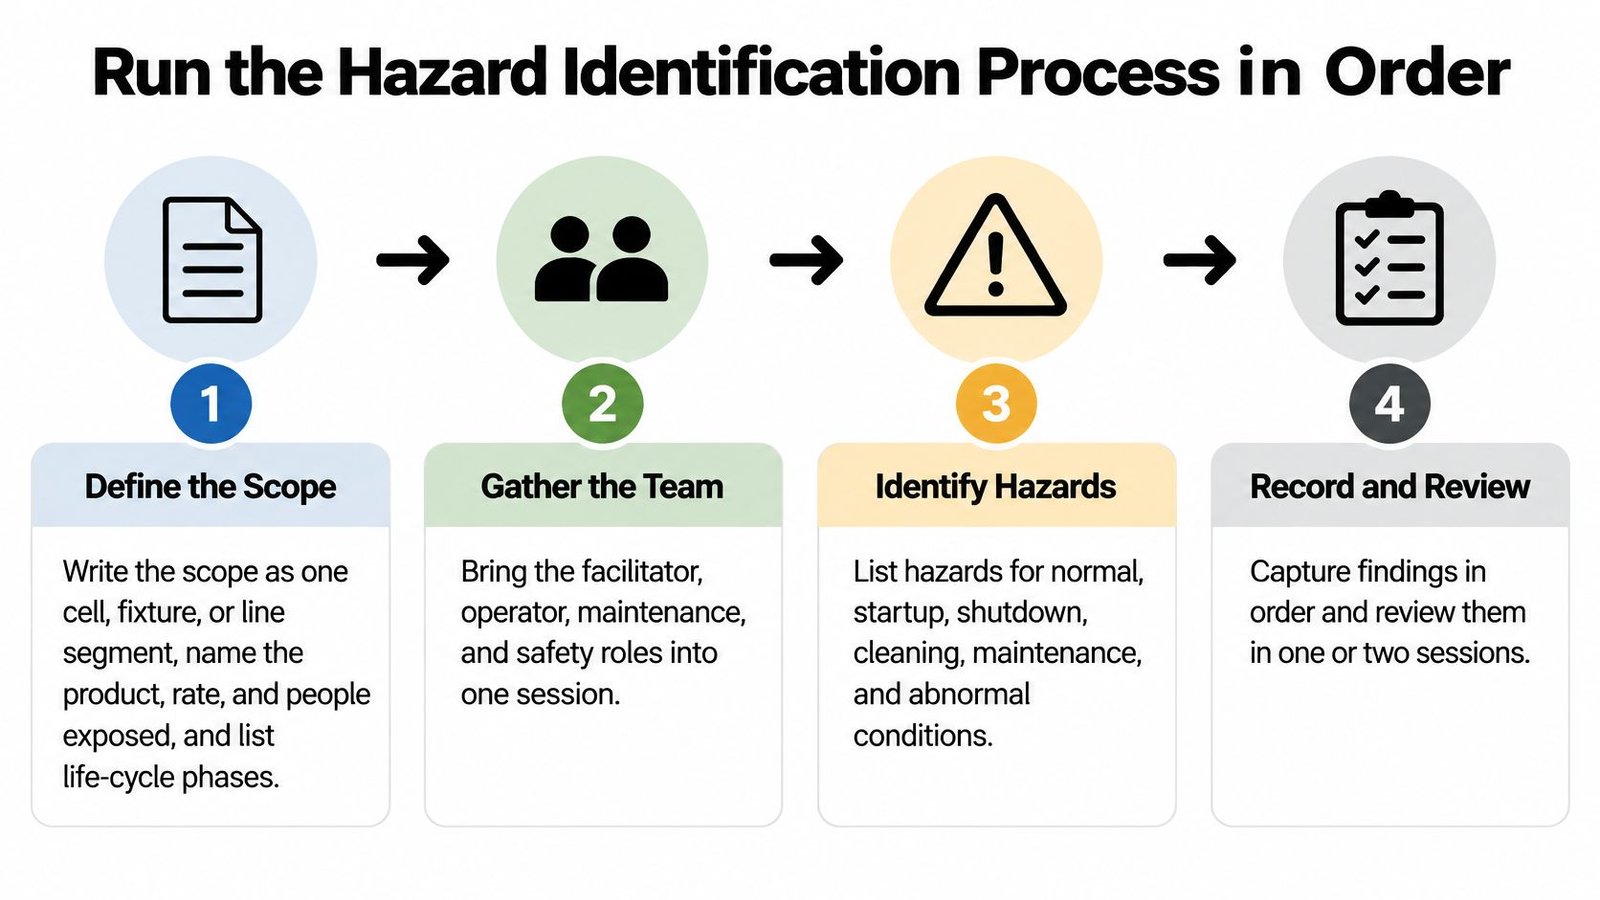
Run this sequence in one or two sessions and don't let the team jump to solutions in step five. The OSHA hazard identification guidance treats this as a repeating loop built on collecting process information, inspecting routine and nonroutine work, investigating incidents and near misses, and ranking hazards by consequence severity, event likelihood and number of exposed workers. That structure is what turns floor observations into auditable engineering requirements.
The flow below condenses the sessions into four visible stages for the workshop wall.
The Ten Steps a Facilitator Can Run
- Write the scope narrowly. Name one cell, fixture or line segment, plus the product, target rate and people exposed. List life-cycle phases from concept through decommissioning so installation and scrap don't disappear.
- Assemble four to seven people. Bring the process owner, an operator, maintenance, quality or GMP, and controls or safety. Keep a decision maker in the room so actions get owners instead of suggestions.
- Collect evidence before the meeting. Pull process descriptions, chemical and equipment documents, prior incidents and near misses, inspection notes and the last change record. Don't waste workshop time hunting for a drawing.
- Walk the task sequence. On the floor or from a layout, step through load, run, unload, setup, cleaning and lockout. Mark every energy source and access point as you go.
- Identify without scoring. Work one task at a time and record hazards, situations and events. Scoring now slows disclosure, because operators stop raising items they think will rate low.
- Record exposure on each row. Write who's exposed, when exposure happens and what safeguard exists today. A hazard without an exposed person and a timing is unfinished.
- Estimate and rank. Score severity, likelihood and number of people exposed, then sort the register. High rows move first, even if they're harder to fix.
- Assign the closeout fields. Every row needs an owner, due date, verification method, residual-risk rating and re-evaluation trigger. Blank fields are where actions die.
- Write interim controls transparently. If a permanent control can't ship with the design, name the interim control and keep the serious hazard open. An interim measure buys time, it doesn't close the row.
- File the register with the design package. Put it where the next engineer, auditor or integrator will find it. A register in someone's email isn't a control system.
Two Slips That Waste the Session
The first slip is inviting only engineers. Engineers know intended operation, but operators know the workaround when a sensor faults at hour six, and maintenance knows which guard takes twenty minutes to remove. Leave them out and you'll document the cycle as designed, not as run.
The second slip is treating PPE or a procedure as a closed action before anyone tries to remove or redesign the hazard. Gloves don't fix a reachable point of operation, and training doesn't fix a guard that's routinely bypassed. I would keep any row open until the team has tested whether a stronger control fits.
Score Each Hazard on a Shared Matrix
Scoring fails when each discipline uses its own gut feel. The ANSI overview of ISO 12100 risk assessment explains that ISO 12100 separates risk estimation into severity of possible harm and probability of that harm occurring, with probability influenced by exposure and the likelihood of the hazardous event. Score each hazardous situation, not the whole machine, because one cell can hold both a trivial nuisance and a life-changing injury.
Risk Bands and What Must Happen Before Release
| Band | Score | Severity example | Likelihood example | Before release |
|---|---|---|---|---|
| High | 10-16 | Serious injury, unexpected motion, sterility or traceability failure | Could occur in a shift or while clearing a jam | Do not release; remove or guard the hazard; interim control the same day |
| Medium | 5-9 | Recordable injury, rework, or strain across a shift | Shows up at changeover or maintenance | Put the control in the design package and verify at FAT or SAT |
| Low | 1-4 | First aid or a nuisance alarm | Rare, and few people exposed | Procedure and training are acceptable; recheck after rate or staffing changes |
Use a 1 to 4 severity scale and a 1 to 4 likelihood scale, multiply them, and sort by band. For severity, 1 is first aid or a nuisance stop, 2 is medical treatment, restricted duty or a quality hold, 3 is serious injury, major contamination or a line stop, and 4 is permanent disability, fatality or a sterility or traceability failure. For likelihood, 1 is rare with few people exposed, 2 is possible during maintenance, 3 is expected at changeover or jam clear, and 4 is expected during a normal shift.
Two Rows That Should Score Differently
Say an operator reaches past a small press to clear a misfed part several times a shift. Severity is 3 for a crush injury and likelihood is 3 because jams are expected, giving 9 before you argue about detection. That row belongs in the design package with a verified safeguard, not in a training file.
Now say a maintenance technician accesses the same zone once a quarter under lockout to replace tooling. Severity stays 3, but likelihood drops to 1 if energy isolation is verified, giving 3. Same machine, same zone, different situation and a different proportionate response. That contrast is the point of scoring situations rather than equipment.
A low-consequence pinch point on a slow fixture might score 2 x 2 = 4 and sit with a procedure and a named review owner. Unexpected motion after restart might score 4 x 3 = 12, which blocks release until an elimination or engineering control is verified. Don't average those rows into a comforting middle number.
For device lines, add a second consequence column for product harm. A scratch, part mix-up or contamination pathway may not injure the operator, but it can scrap a lot, trigger a hold or break traceability. Write both scores on the register row itself, not in a side spreadsheet nobody opens at commissioning.
Convert Hazards into Controls That Stay in Place
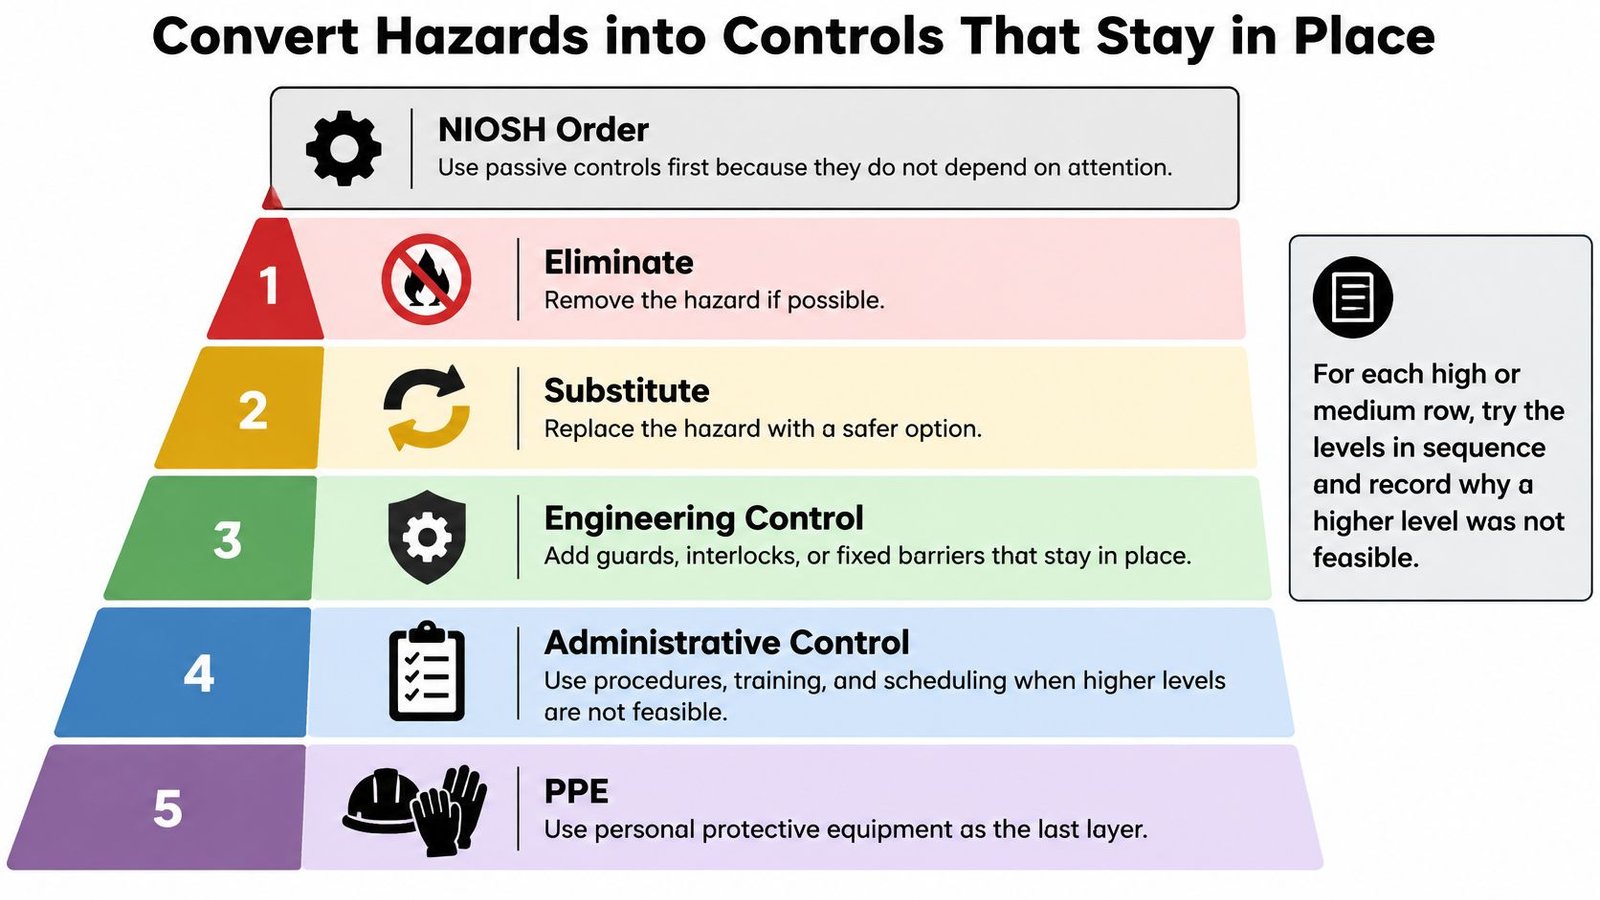
Start from the top of the hierarchy and work down, in writing. The NIOSH hierarchy of controls orders controls as elimination, substitution, engineering controls, administrative controls and PPE, and emphasizes passive controls because they reduce exposure without depending on worker attention or behavior. For each high or medium row, try the levels in sequence and record why a higher level wasn't feasible.
The diagram below is the order to test, strongest first.
Control Hierarchy on a Semi-Automated Cell
| Level | Example on the cell | Depends on behavior | Use as |
|---|---|---|---|
| Elimination | Remove the manual deburr or hand-transfer step | No | First choice |
| Substitution | Lower-force clamp, safer solvent, or different locating feature | No | Next if the step must stay |
| Engineering | Fixed guard, interlock, light curtain, or automated handling | No | Primary control when the hazard remains |
| Administrative | Lockout, changeover SOP, supervision, scheduling | Yes | Support, not the main closeout |
| PPE | Gloves, eye protection, gowning | Yes | Last layer or supplement only |
Elimination removes the step entirely, such as taking hand deburr or hand transfer out of the cycle. Substitution changes material, energy or method, such as a lower-force clamp or a less hazardous cleaner. Engineering controls isolate people with fixed guards, interlocks, presence sensing, distance or automated handling, and our overview of machine safeguarding standards and practical guarding choices can help you match the safeguard to the access frequency. Administrative controls and PPE support those measures, they don't replace them.
Test the Control the Way People Will Actually Use It
Stress every proposed control against foreseeable misuse, bypassing, a degraded or dead sensor, loss of power, restart, maintenance access and predictable human error. If an operator can tape down an interlock to keep rate, you've designed a bypass incentive, not a safeguard. If a light curtain mutes during a fault and motion can restart, the control fails its most important test.
Release rule in practice: A procedure does not close a hazard that is still physically reachable.
Suppose a semi-automatic dial uses locator pins that scratch product as parts seat. Gloves, a caution label or an inspection step won't fix that, because the damaging contact is built into the locating method. The proper fix is a locating feature that doesn't mark the part, then guarding on the remaining dial motion and a check that confirms seating without hand pressure. Substitution and engineering solve it, administrative controls only document it.
Don't stop at the first measure that's merely possible when a stronger one fits the budget and footprint. After selection, write the acceptance criteria, who's trained and the residual score on the register row. Re-score the row if tooling, software, layout, production rate or material changes, because the verified control may no longer match the exposure you originally scored.
Tips for Automation Changes and Abnormal Modes
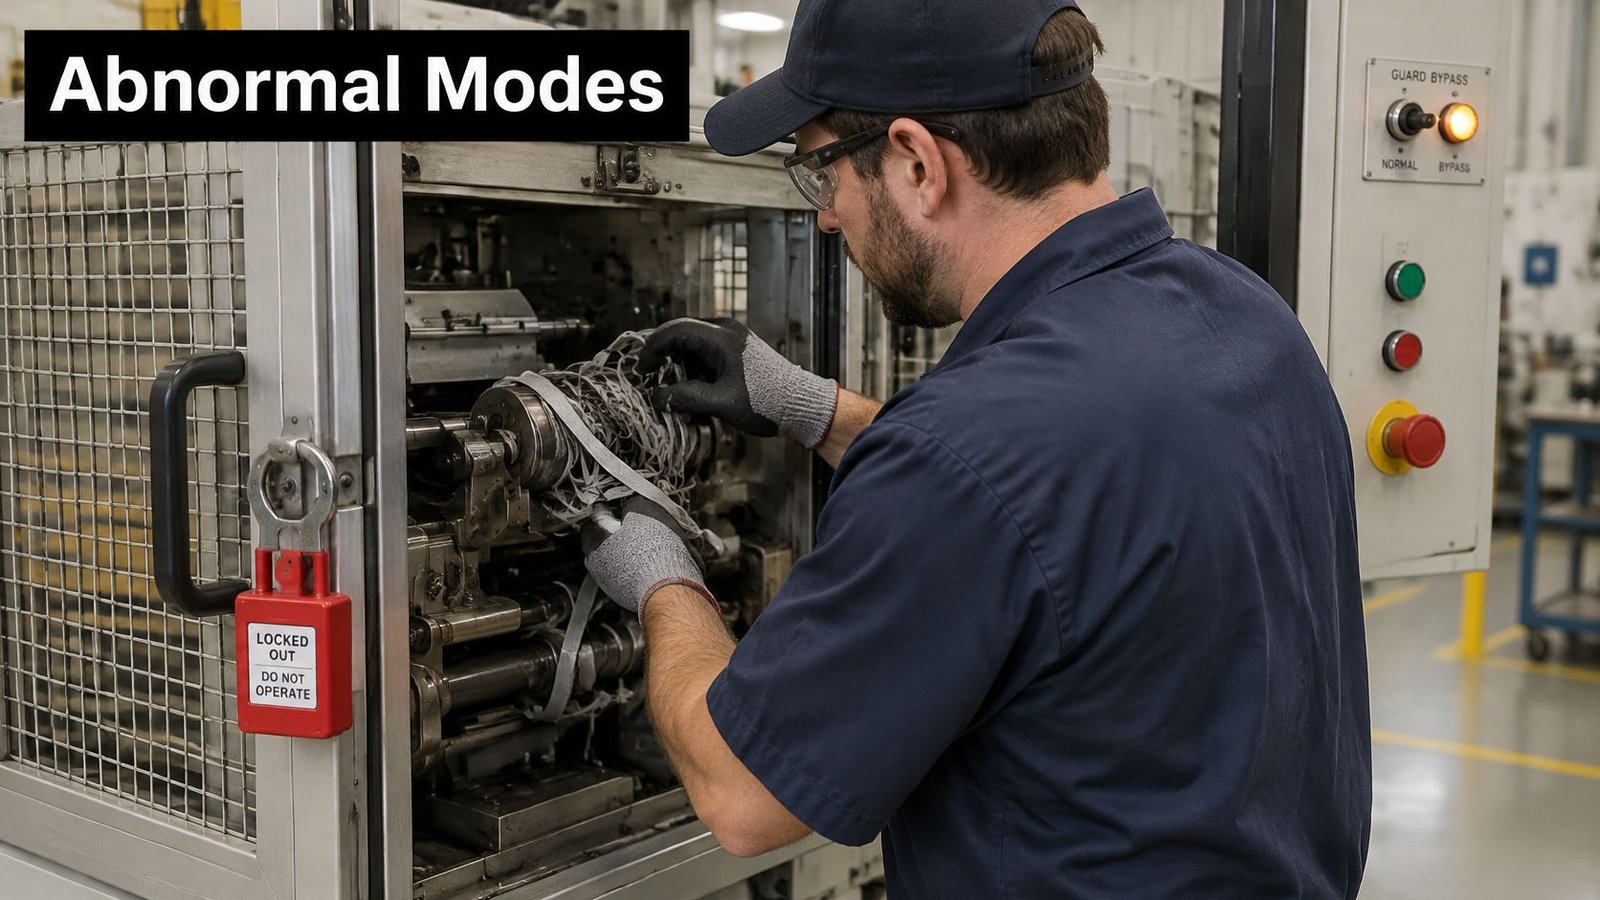
A cell can look safe in automatic cycle and still hurt someone the moment a guard opens or an operator clears a jam without stopping. The IDEC guide to ISO 12100 covers the full machinery life cycle, including transport, assembly, installation, commissioning, operation, dismantling, disabling and scrapping, plus setup changes, maintenance, servicing and cleaning. Map each mode to its energy sources, who interacts, foreseeable misuse, temporary controls and the proof you'll collect.
Before you walk the line, look at where maintenance access and energy isolation happen, not where the drawing assumes they happen.
Map Every Mode, Split Every Long Line
On a long line, review material input, transfer, assembly, inspection and finished-product discharge separately. The input station may create ergonomic strain from tray handling, the transfer may create a pinch point, and discharge may tempt an operator to reach into moving accumulation. One generic note for the whole line hides all three.
Cover these mode-specific questions for every station:
- Jam clearing: Can the operator reach the jam with energy present, and does the cell stop safely when the guard opens?
- Changeover: Which tools, lifts and adjustments are needed, and where do hands go while the fixture is open?
- Sensor failure: Does a failed sensor stop motion, freeze the cycle or allow a dangerous default state?
- Restart behavior: After power loss or an emergency stop, can anything move before a deliberate reset?
- Manual fallback: When automation is down and people hand-feed parts, which safeguards disappear?
- Software change: Did the update alter speeds, muting, alarms or restart logic that the original review relied on?
The short video below is useful for showing a mixed team how quickly a normal task becomes an abnormal exposure when someone improvises around a fault.
Validation Evidence That Holds Up
At FAT or SAT, run the normal cycle and at least one abnormal case. Defeat a guard interlock on purpose in a controlled test and confirm a safe stop, kill power and restart to confirm no unexpected motion, and time a real jam clear and changeover with the actual tools operators will carry. Record acceptance criteria, the person trained and the residual score while the equipment is still in front of you.
Finding a pinch point is unfinished until the register says who is exposed, when, and which control is verified before release.
Watch leading indicators instead of waiting for a recordable case. Track near misses, bypass attempts, nuisance trips, alarm overrides, maintenance workarounds, rejected parts, discomfort reports and minutes spent in manual recovery. A quiet incident log can mean weak detection rather than low risk, especially for software-dependent safeguards, remote support access and collaborative tasks where nobody reports a close call.
Reopen the Register Before the Next Change
A hazard register that only lives in a commissioning binder protects nobody after the first retrofit. Reopen it whenever process, material, staffing, layout, rate, software or automation level changes, and on a set cycle of at least once a year for an active cell. That's the practical link to ISO 45001 expectations around worker participation, legal requirements, incident learning and continual improvement, all of which point back to the same living file.
Triggers That Should Not Wait for the Annual Date
- Near miss or first aid case: Someone was exposed in a way your scoring didn't predict, so rescore that situation.
- Bypassed interlock or defeated sensor: The verified control no longer exists in practice, regardless of what the drawing says.
- New product on the same fixture: Different size, weight or features can change reach, clamping force and jam frequency.
- Faster cycle or higher rate: Likelihood and ergonomic exposure rise even if the hazard source looks identical.
- Manual fallback added for a labor gap: You've introduced hand feeding or hand transfer that the original automation removed.
What a Defensible Record Contains
Each open and closed item needs the hazard, people exposed, score, control level, owner, due date and any interim control. Add the verification result, residual score and next re-evaluation trigger before you call it closed. Keep worker input, incident and near-miss notes and the design revision in the same file so an auditor or a new process engineer can see why a guard, tooling change or software limit exists.
Before approving a retrofit or a new semi-automatic station, rerun the method you already chose and rescore only the changed tasks. Use a disciplined equipment commissioning checklist for release and handover so verification evidence lands in the same package as the register. Don't release while a high band still lacks a verified control, even if production is pressing for the capacity.
When labor gaps, quality drift or bottlenecks are pushing a layout change, a hands-on evaluation beats another blank checklist. SEA's Safety Enhancements service identifies risks and engineers solutions that protect the workforce, and every engagement begins with a hands-on evaluation of the customer's current systems. We start with a free discovery consultation to learn your current process, what's working, what isn't and the goals you're aiming to achieve, then we engineer the fix rather than adding warnings around a hazard that should have been designed out.
If you're planning a semi-automated workstation, retrofitting a cell or trying to close high-risk rows that keep surviving on procedures alone, System Engineering & Automation can evaluate your current process hands-on, identify the hazards that show up in abnormal modes and engineer controls that stay in place. Start with a free discovery consultation so we can see what's working, what isn't and what your production goals require before equipment is released.